Toilet Tank Rebuild
My first draft of this post was about trying something different during a recent toilet tank rebuild. However, due to a leak issue after the first rebuild attempt and then shelving the idea I had, I decided to re-write the post about my rebuild experience.
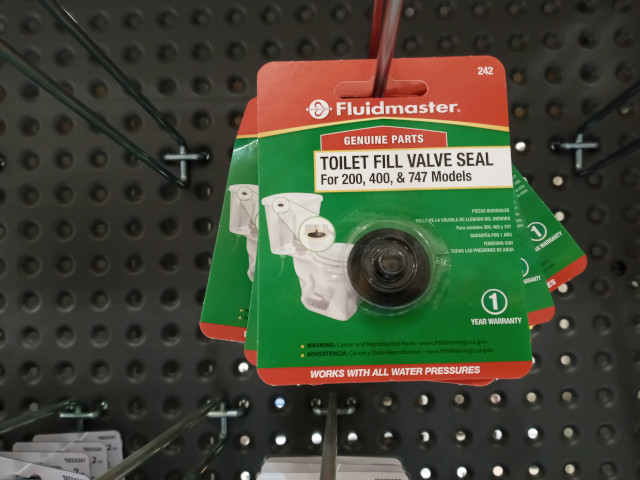
Towards the end of last year, the toilet in our powder room began making a high pitch sound after it was flushed. We had a Fluidmaster fill valve and a little bit of Internet research turned up two possible causes: grit in the fill valve seal or the fill valve seal was shot.
I drug my feet on determining the exact cause because I hate doing toilet repair; tight work space, water, leaks, dirt…yeah, I hate it. I finally made myself test the fill valve one night earlier this year by turning off the water and then I removed the cap on the top of the fill valve. I didn’t see any grit on the seal. The next step was to flush the seal area so I placed a cup over the fill valve, turned on the water, and allowed the water to run for about a minute.
I turned off the water, replaced the fill valve cap, turned the water back on, waited for the tank to fill, and then flushed the toilet. The high pitch sound still existed. That meant that the fill valve seal was shot and the only remedy was to replace the fill valve, or so I thought.
It hasn’t been too many years since I installed the Fluidmaster fill valve, so I was a bit peeved that it went bad quicker than what I thought it should. I decided to purchase a Korky fill valve this time as a replacement.
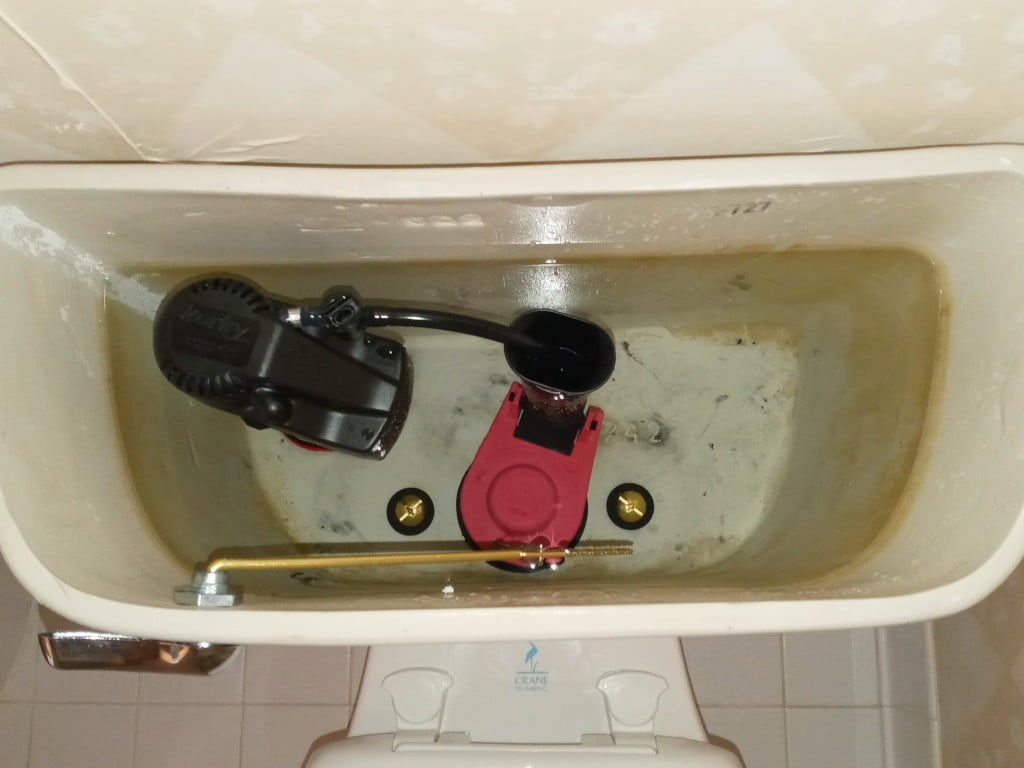
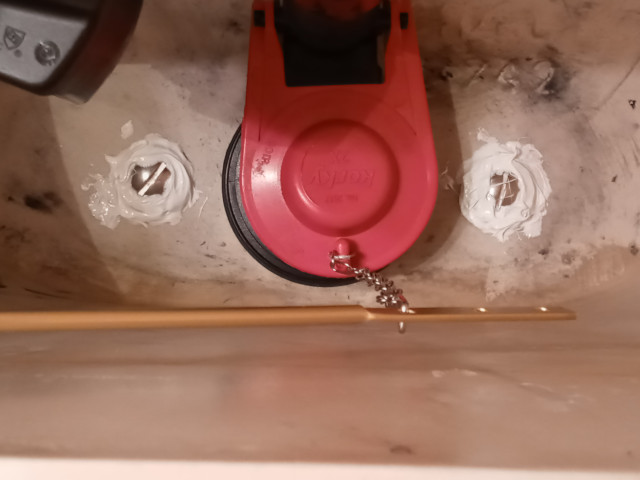
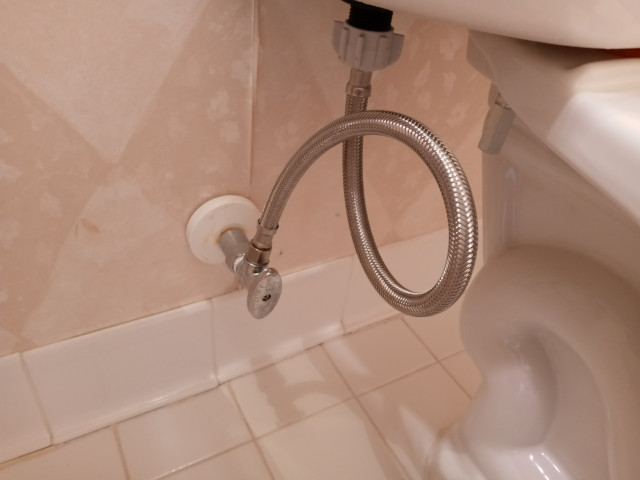
I made time a few weeks ago to replace the fill valve. I turned off the water, flushed the toilet, removed as much remaining water as possible using a small plastic cup, and then I used a sponge to remove the remaining water. I then removed the steel braided water hose connection from the water supply line to the toilet. The toilet tank bolt washers were pretty much shot, quite possibly due to chlorinated water exposure. I decided to just go ahead and replace all of the toilet tank parts since I was now going to have to remove the tank.
The first time I attempted a toilet tank rebuild years ago, water leaked from the tank bolts connecting the tank to the bowl. A staff member in the plumbing department of a now defunct big box hardware store told me to use silicone caulk under the washers. I tried the suggestion and it solved the water leak issue.
After re-installing the toilet tank and tank bolts this time, I noticed a gap between the tank and the bowl caused by the tank-to-bowl gasket. I had already tightened the tank bolts quite a bit, so I didn’t want to tighten them more for fear of cracking the tank, the bowl, or both. I read the instructions provided by Fluidmaster in the flush valve repair kit, but nothing was mentioned about whether or not a gap between the tank and the bowl was okay. All that was mentioned was not to overtighten the tank bolts. I wondered what exactly constituted overtightening, so I decided to do some research on the Internet.
I came across a very informative post on the Pepper’s Home and Garden site and I learned that my initial experience with leak issues from the toilet tank bolts years ago might possibly have been due to overtightening the tank bolts. On the other hand, adding the silicone caulk under the rubber washers gave me a little more peace of mind.
I thought about possible ways to prevent the rubber tank bolt washers from disintegrating due to chlorinated water exposure and I thought maybe covering the washers in silicone caulk might prevent the disintegration. After waiting about 24 hours after installing the bolts to allow adequate time for the silicone caulk under the rubber washers to dry, I covered the washers with silicone caulk.
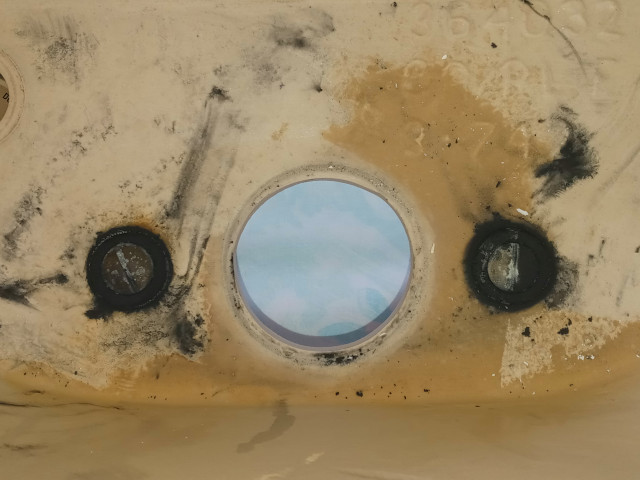
In the past when I’ve performed toilet tank rebuilds, I’ve always hooked everything back up before testing. This time fortunately, I came up with the idea of not hooking up the water supply hose until I tested for leaks. I just used an empty 1-gallon vinegar bottle to pour water into the toilet tank. After about a 2-hour wait, I checked the toilet and much to my dismay, there was a leak from the right toilet bolt, even with all of the caulk I had applied on the toilet bolt washers. Thinking back to the post I read on the Pepper’s Home and Garden site, I decided to loosen the right bolt under the toilet bowl a little. However, the leak still persisted.
The other issue that may have been the main contributor to the leak issue was that the tank bolts that came with the Fluidmaster K-507A-008 flush valve repair kit that I purchased from Lowes only had 2 rubber washers, 2 metal washers, and 2 nuts. Better tank bolt kits (in my opinion) come with at least 4 rubber washers, 4 metal washers, and 4 nuts. Some of the other Fluidmaster products containing tank bolts come with the better tank bolt kit, so I’m not sure why the K-507A-008 flush valve repair kit is different.
I decided to see what offerings Amazon had for toilet tank bolts and I discovered Hibbent toilet tank bolts (company site), featuring compression washers for use inside of the toilet tank. The toilet tank bolt set also came with the desired number of washers and nuts. Based on the rave reviews, I decided to go ahead and purchase a set even though it was pricey.
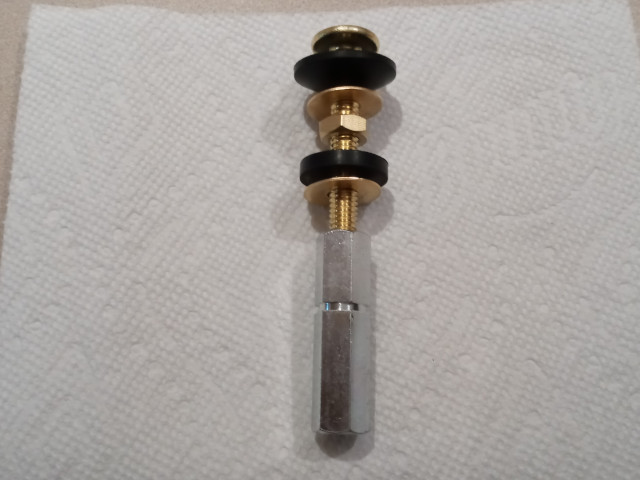
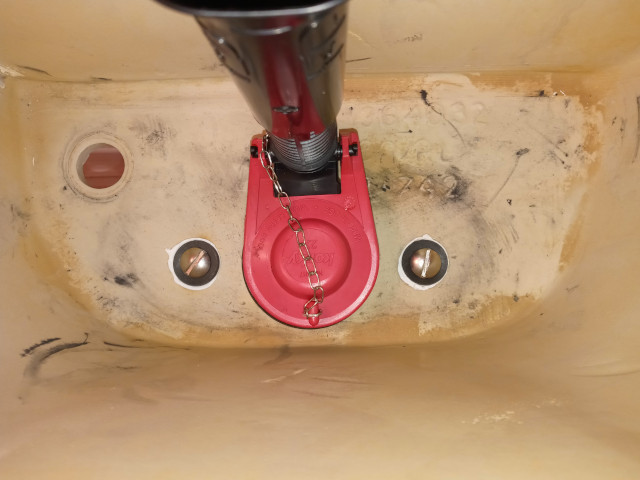
After draining and drying out the toilet tank once again, I removed it from the toilet bowl and awaited the delivery of the Hibbent toilet tank bolts. The Hibbent toilet tank bolts were a breeze to install. The elongated nut that secures the bolt to the bowl made a big difference in installation ease.
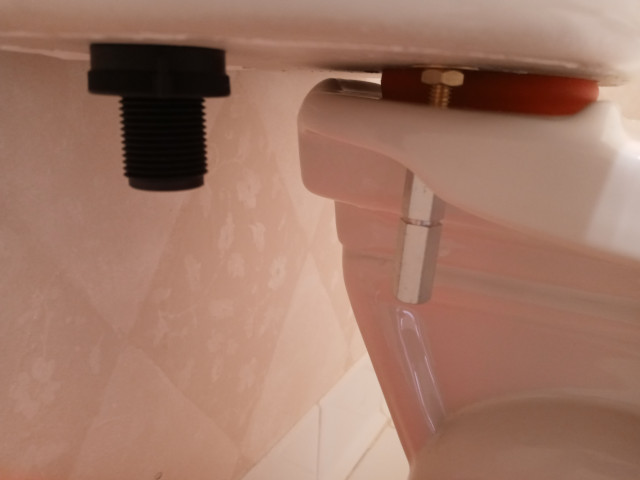
I had forgotten that the toilet in our powder room was installed a little too close to the back wall, resulting in the tank resting right up against the wall. The tank position required pulling the tank forward just a smidgen so that the lid could be installed on, or removed from, the tank. The tank lid was then right up against the wall. It wasn’t a big deal as the previous owner of our home placed wallpaper on the powder room walls, so the lid wasn’t grinding directly into the drywall.
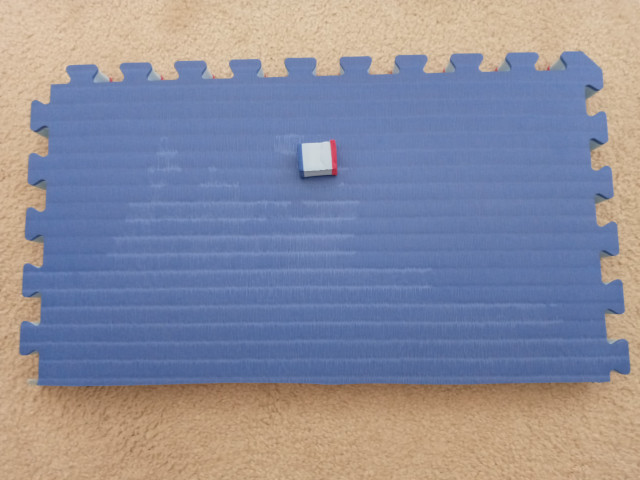
I purchased a 2-ft x 2-ft x 1.5-in piece of Home BBJ mat from Great Mats back in May to cut in half and use to elevate my laptop when I used it on my desk in my home office. The mats are interlocking, so they have interlocking tabs along all 4 sides. I cut off the tabs for the half I used for my laptop platform, so I decided to try and use one of the removed tabs as a shim and it worked perfectly.
 |
I poured a gallon of water into the tank for the first leak test. After about 2-3 hours, I checked and there were no leaks. I then filled the tank up to the normal water level for the second leak test and allowed everything to sit overnight. When I checked the following day, there were no leaks. Hurray!
Next I installed the water supply tube from the fill valve to the flush valve overflow tube. I then installed a new steel braided water supply hose from the water supply line to the fill valve. You should almost always install a new water supply hose when removing the existing hose if the existing hose has been on for some time. Otherwise, you risk dealing with a leak issue due to deformed compression washers in the hose connectors.
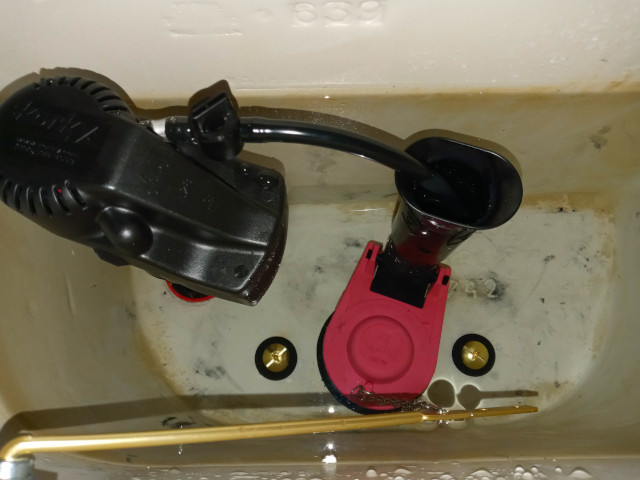
The Korky fill valve installation instructions have you connect a plastic tube to the fill valve, insert a metal clip on the opposite end of the plastic tube, and then push the metal clip onto the flush valve overflow tube. Doing so results in the plastic tube being elevated slightly above the flush valve overflow tube.
I turned on the water and I didn’t like the way the water was splashing as it exited the tube coming from the fill valve into the flush valve overflow tube. I attempted to bend the metal clip a little in an attempt to better angle the water flow, but the clip loosened to the point that it didn’t grip the flush valve overflow tube very well. So I removed the existing setup and installed the leftover plastic tubing I had. I just shoved the other end of the plastic tube down into the flush valve overflow tube.
So far, everything is working perfectly. There are no leaks, the toilet flushes correctly, and there is no more high pitch noise coming from the fill valve when you flush the toilet; mission accomplished.
The same day I completed the toilet tank rebuild, I went to Lowes to purchase something and I decided to check the plumbing aisles to see if I could find a silicone gasket for a bathroom faucet replacement project (I didn’t find a silicone gasket). While in one of the plumbing aisles, I checked the toilet repair section and discovered that Fluidmaster sells a replacement toilet fill valve seal. However, I think I made the right decision just to do a toilet tank rebuild.
Do you have any useful information to share about rebuilding a toilet tank? Share your information in the Comment box at the bottom of the page.
2021-009


You May Also Like

Things to Consider When Buying a Home

My Repetitive Strain Injury (RSI) Experience