Homemade Yogurt Using Milk and Probiotic Capsules
Updated on 2025-09-08
Contents
- 01 – Introduction
- 02 – Change of Mind
- 03 – More Research
- 04 – Time to Put My Plan into Action
- 05 – My First Batch
- 06 – My Second Batch
- 07 – My Third Batch
- 08 – My Fourth Batch
- 09 – My Fifth Batch
- 10 – Mason Jar Storage
- 11 – Recipe
- 12 – Conclusion
- 13 – Solgar Advanced 40+ Acidophilus Health Benefits
- 14 – Useful Resources
01 – Introduction
In April 2022, I watched a video on the Mary’s Nest YouTube channel about making your own yogurt. I had just successfully made my first batch of ghee, so I was intrigued about being able to make my own yogurt as well.
I consume a lot of yogurt; currently about 6 quarts a month. I eat yogurt mixed with fruit preserves as part of my breakfast on a daily basis. I also have a few bread recipes that call for yogurt. Lastly, I use yogurt as a dip, salad dressing, and baked potato topping.
I decided to do a bit more research and I found a very informative series of posts on making homemade yogurt on the Salad in a Jar site. I generated a number of PDF files from the posts on the site, as well as making a few entries in my Emacs Org Mode Food Info, Tips & Recipes database.
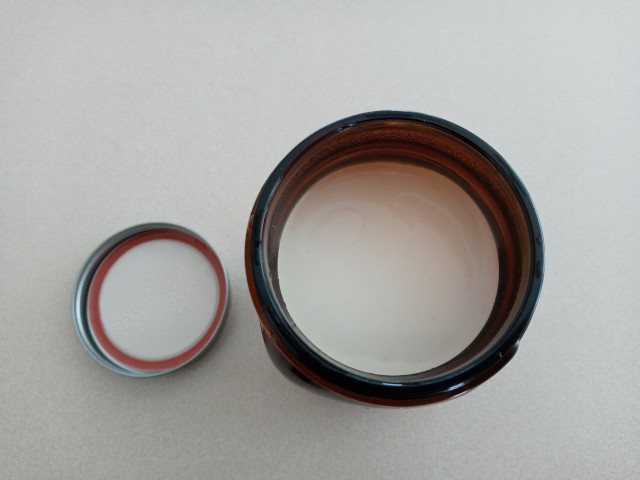
I added items that would be required to make homemade yogurt to my Amazon wish list; amber quart-size wide mouth Mason jars, plastic wide mouth canning lids, and a thermometer.
However, the more I thought about how much time it might take to make my own yogurt, the more I thought it might not be worth the time since store-bought yogurt wasn’t too expensive at the time.
02 – Change of Mind
In October 2022 things changed though. I usually purchased 3 quarts of Dannon plain whole milk yogurt at the beginning of the month and then later in the month I would purchase 3 quarts of Whole Foods 365 organic plain whole milk yogurt.
In the beginning of October 2022 I went shopping at Walmart, planning to purchase 3 quarts of Dannon plain whole milk yogurt. However, the particular store I went to did not have any Dannon plain whole milk yogurt. No problem I thought to myself. I would just spend a little bit more and buy all of my yogurt at Whole Foods Market.
I went to Whole Foods Market the next day and to my horror, the price of 365 organic plain whole milk yogurt jumped from $3.79 to $4.99 a quart. I was almost out of yogurt, so I purchased one quart thinking I could purchase Dannon plain whole milk yogurt at Wegmans.
I went to Wegmans the following evening only to discover that they were completely out of Dannon plain whole milk yogurt. I was furious. I was able to finally find Dannon plain whole milk yogurt at another Walmart location a few days later. However, remembering the information I had obtained in April about making homemade yogurt, I decided that in November 2022 I would try making my own yogurt after the out-of-stock and ridiculous price increase experiences.
03 – More Research
I decided to do more research on making homemade yogurt. I didn’t like the idea of using large bowls as was presented in the video I watched on the Mary’s Nest YouTube channel. I also didn’t like the idea of having to buy yogurt to use as a starter culture and I didn’t want to purchase an heirloom yogurt starter because you need to make yogurt frequently to keep the cultures alive. Heirloom yogurt starter is also a bit pricey. I thought maybe using probiotic capsules might work, but I had trouble finding out whether or not that would work.
Then I came across a post on making homemade yogurt where a reader replied that she had been successfully using a probiotic called Acidophilus 40+ to culture her yogurt, although she didn’t provide any details. I later used a search engine to look up Acidophilus 40+ and I discovered that the product was actually called Advanced 40+ Acidophilus and it was made by Solgar.
I continued researching different methods of heating the milk and incubating the yogurt. I wondered if you could heat milk and incubate yogurt in a slow cooker, so I began searching that method and I discovered that the method would work. I also discovered that heating the milk at 180 degrees Fahrenheit for 20-30 minutes (I call it the cook method), instead of just bringing the milk up to the same temperature and then cooling it (I call it the no-cook method), resulted in a thicker, creamier yogurt.
The more I thought about using a slow cooker though, the less the idea appealed to me. It seemed to me that it would be an additional process, and possibly a messy one, to transfer the yogurt from the slow cooker to canning jars once the yogurt was incubated.
I decided to see what YouTube might have to offer and I came across a video on the Jill Winger – Old Fashioned on Purpose channel where Jill heated milk and incubated the yogurt in quart-size, wide mouth canning jars. Jill incubated the yogurt by placing the jars of properly cooled milk in a large food dehydrator. I didn’t like the idea of heating the milk in canning jars because you have to add a starter to, and then stir the contents of, each jar. I did like the idea of incubating the yogurt in canning jars though.
I wanted to go low tech to incubate my yogurt and I remembered reading a post on the Salad in a Jar site about incubating yogurt in a cooler by filling the cooler with water at a temperature of 130 degrees Fahrenheit up to the necks of the jar(s) of yogurt. I didn’t like the idea of using hot water in a cooler because of concerns about damaging the plastic interior, so I decided that placing the water in canning jars and placing everything in a cooler might work.
04 – Time to Put My Plan into Action
Now that I had a plan, it was time to put it into action. I ordered 60 Solgar Advanced 40+ Acidophilus capsules from iHerb. I also ordered a half dozen amber quart-size wide mouth Mason jars and 16 wide mouth plastic canning lids from Amazon.
I had an Igloo Playmate Elite 16-qt cooler that has sat unused for years in the basement, so I didn’t need to purchase a cooler.

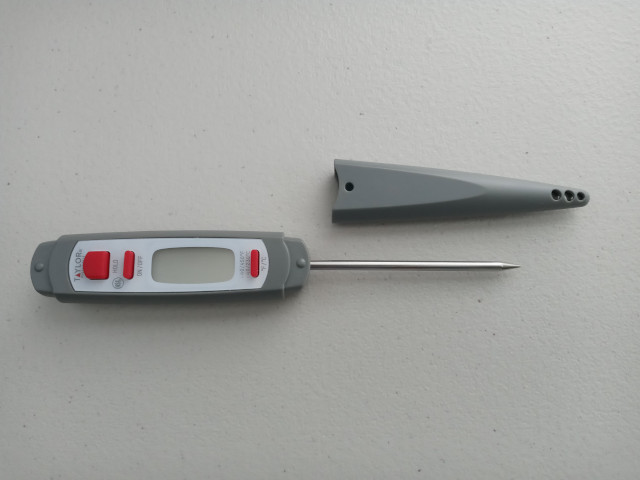
While making my yogurt making equipment purchase from Amazon, I forgot to purchase the thermometer I had on my wishlist, so I decided to purchase a handheld digital thermometer from Walmart.
05 – My First Batch
I wasn’t sure how much probiotic to use, so I decided to only try making one quart of yogurt for my first attempt in case it didn’t work out. I attempted to get an idea about how much probiotic to use by searching the Internet, but the recommendations were all over the place and I thought some of the recommendations were more than what should be necessary to culture yogurt. Therefore, I decided to try using one capsule of Solgar Advanced 40+ Acidophilus for my first quart of yogurt.
It took me just over 31 minutes to heat the milk to about 180 degrees Fahrenheit over low to medium-low heat on a gas stove. I then kept the milk at about the same temperature for another 20 minutes, stirring frequently. I then turned off the heat, placed a lid on the pan, and allowed the milk to cool to the recommended temperature range to make yogurt.
It took 50 minutes for the milk to reach a temperature of 112 degrees Fahrenheit, which is within the recommended range of 100-115 degrees Fahrenheit for culturing milk to make yogurt.
About 15 minutes prior to the milk reaching the ideal temperature, I began heating water to place in 4 quart-size wide mouth Mason jars to create heat in the cooler. I microwaved water in a Pyrex 64-oz measuring cup to a temperature of around 130 degrees Fahrenheit, I placed lids on the jars, and then I placed the jars in a cooler.
Because Igloo Playmate coolers do not have an insulated lid, I was concerned about how well the cooler would maintain the proper heat level. I had some Blizzard Fleece remnants from when I had my wife make me some sarongs back in December 2021, so I used a folded remnant placed over top of the Mason jars.
When the milk reached the ideal temperature range, I opened one capsule of Solgar Advanced 40+ Acidophilus and emptied the contents into the pan of heated milk. I then stirred the milk to mix the probiotic into the milk well. I then poured the contents into one quart-size wide mouth Mason jar, placed a lid on the jar, and then placed the jar in between the jars of heated water in the cooler.
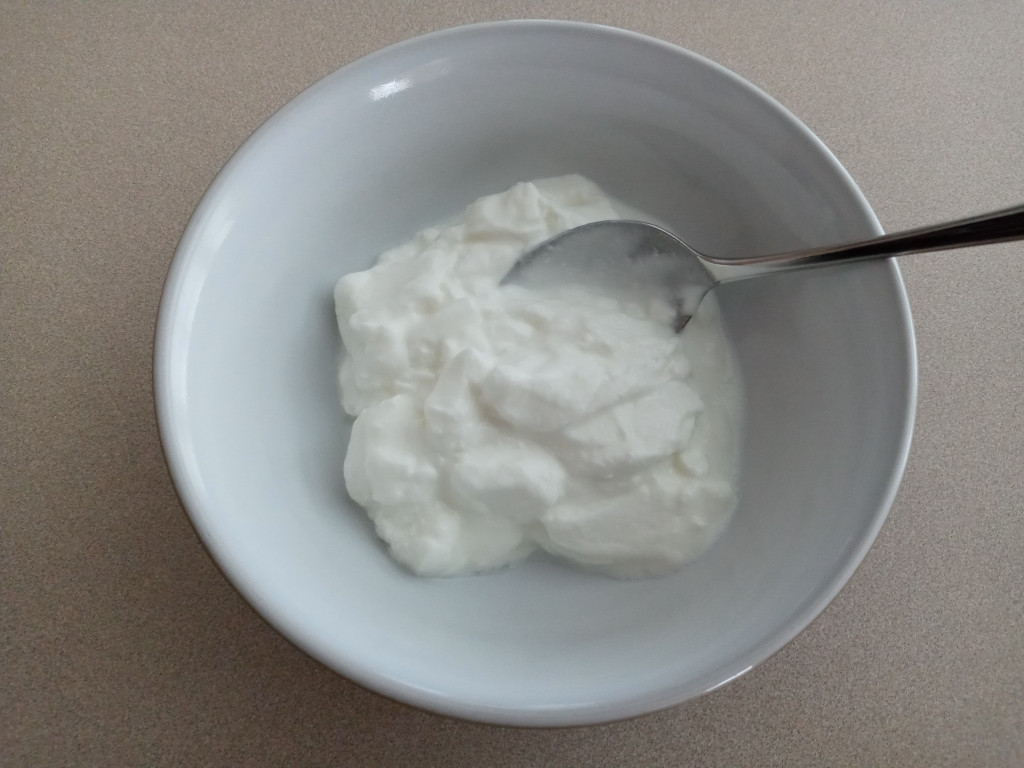
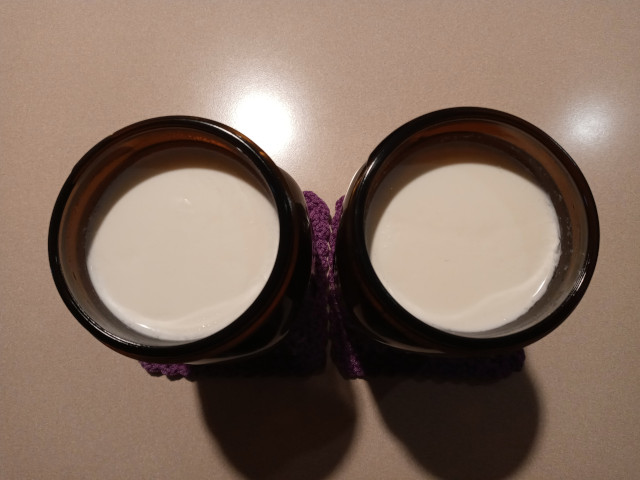
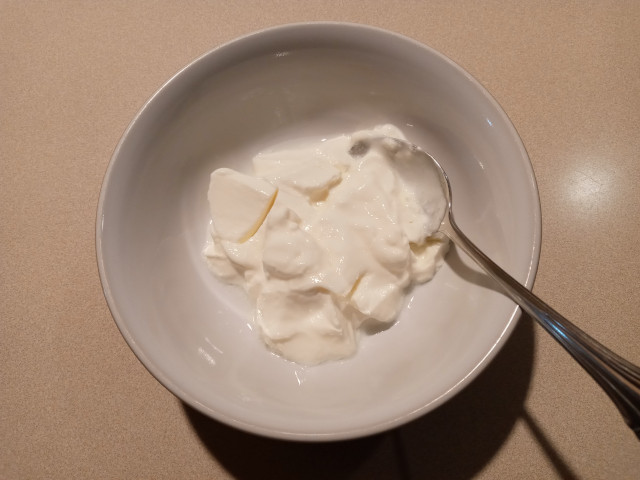
I allowed the milk to incubate for about 7.5 hours and the finished product turned out perfect. The yogurt was very smooth and creamy.
I tasted the yogurt a few days later when I used some of the yogurt as a starter for making a second quart and the taste was phenomenal. The consistency was like a creamy, thick custard.
06 – My Second Batch
The time it took to bring the milk to a temperature of 180 degrees Fahrenheit when making my first quart of yogurt took too long. I would be heating a half gallon of milk in the future to make two quarts of yogurt at a time, so the heating time would take even longer. I desired to cut the milk heating time down.
Paula (Salad in a Jar) stated in one of her posts that she microwaved her milk, taking much less time than heating on a stove. So for my second quart of milk, I microwaved the milk to bring it up to about 145 degrees Fahrenheit. I then poured the milk into a pan and continued heating it at low to medium-low heat, stirring frequently. The milk quickly reached a temperature of 185 degrees Fahrenheit, so I only continued heating the milk for another 15 minutes.
I didn’t want to use another capsule of Solgar Advanced 40+ Acidophilus probiotic, so I just used two small spoonfuls of yogurt as a culture starter from the first quart that I made.
The resulting yogurt didn’t look as nice on the top as my first quart. I moved the cooler at one point well into the incubation process, so the movement must have been the cause for the yogurt not being smooth on the top. There was also quite a bit of liquid on the top, but I’m not sure if the liquid was from condensation or if it was whey that had worked its way to the surface. However, whey is yellowish in color and the liquid on top of the yogurt was clear, so it probably was condensation.
I opened my second quart of yogurt after finishing the first quart. The first spoonful was the same consistency as that of the first quart and the taste was the same.
07 – My Third Batch
I knew that one capsule of Solgar Advanced 40+ Acidophilus probiotic worked to make one quart of yogurt. However, I wanted to find out if one capsule would be enough to make two quarts of yogurt. Therefore, for my third batch of homemade yogurt, I used one capsule of probiotic for a half gallon of properly heated milk.
Once again, I heated the milk in the microwave and then I transferred the heated milk to a pan to continue heating at about 180 degrees Fahrenheit for 20 minutes on a gas stove at low to medium-low heat, stirring frequently. After allowing the milk to cool to about 114 degrees Fahrenheit, I added the contents of one capsule of probiotic. I then gave the mixture a good thorough stir to make sure the probiotic was well integrated into the milk. Next, I poured the mixture into two quart-size wide mouth amber Mason jars, placed canning lids on the jars, and then I set the jars inside the cooler with 4 quart-size Mason jars of heated water. I then allowed the milk to incubate for 7.5 hours.
Success breeds success…the yogurt turned out fantastic, although it was a bit runny compared to the first two quarts that I made. The yogurt being runny was probably due to a large amount of whey. Whenever I opened the second quart of yogurt from the third batch, there was always a layer of yellowish liquid on top of the yogurt. Perhaps a capsule per quart might result in thicker yogurt. The taste was still phenomenal though.
08 – My Fourth Batch
Since my third batch turned out a bit runny, I decided to perform an additional experiment before performing a final experiment. For the fourth batch, I used the same procedure that I used for my third batch, but I used two probiotic capsules instead of one. The yogurt turned out thicker than the third batch, so using one capsule per quart of milk worked better. There was still quite a bit of whey that surfaced to the top of the yogurt each time I opened a jar, except for the first serving. To reduce the amount of whey that collects on top of the yogurt, make sure to read my tip under Additional Notes in the Recipe section.
 |  |
09 – My Fifth Batch
The final experiment I desired to perform was to see how much difference there would be between yogurt created from milk heated for 20 minutes at 180 degrees Fahrenheit or higher (cook method) and yogurt created from milk brought to a temperature of 180 degrees Fahrenheit or higher and then allowed to cool (no-cook method). Paula (Salad in a Jar) makes her yogurt using the no-cook method and she states that it turns out satisfactorily for her.
The no-cook method would save me some more time during my yogurt making process. However, the resulting yogurt had to be almost as good as my first four quarts because they were exceptionally good.
I heated the milk in the microwave to a temperature of 200.1 degrees Fahrenheit, poured the milk into a pan, covered the pan with a lid, and allowed the milk to cool to the ideal incubation temperature range for creating yogurt. Once the milk cooled to within the ideal temperature range, I added the contents of two probiotic capsules, gave the milk a good stir, and then I poured the mixture into two quart-size wide mouth amber Mason jars. Then I placed the jars into the cooler in between 4 quart-size wide mouth Mason jars filled with water heated to about 135 degrees Fahrenheit.
The result…failure. I could tell as soon as I opened one of the jars that the milk had not turned into yogurt. I poured the contents of both jars down the kitchen sink drain. I was a bit discouraged about the failure and I was perplexed as to the reason for the failure. Perhaps the method I use requires cooking the milk for 15-30 minutes once it reaches a temperature of 180-195 degrees Fahrenheit.
I decided not to try the no-cook method again. The cook method has worked flawlessly for me and I didn’t want to spend more time and money experimenting with the no-cook method.
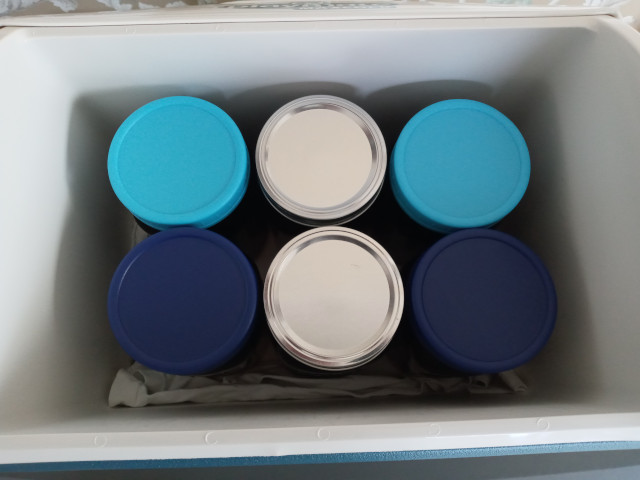
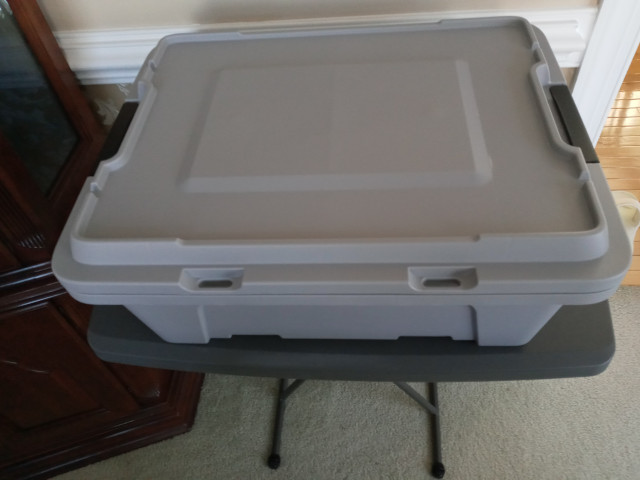
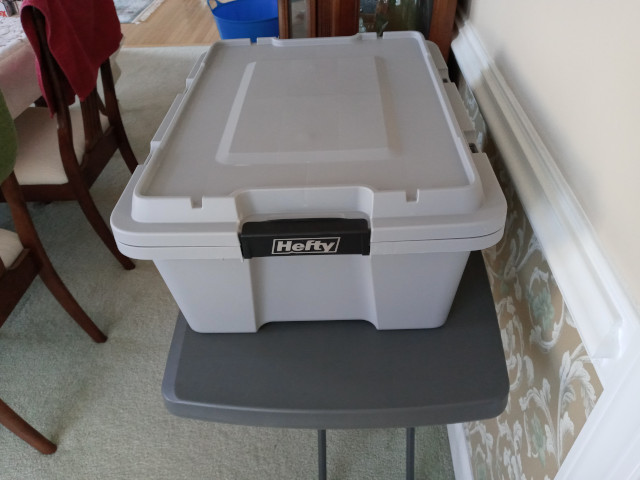
10 – Canning Jar Storage
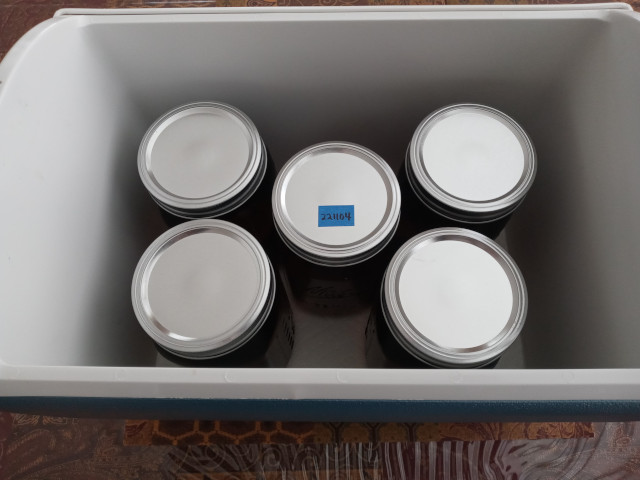
I ended up ordering a total of one dozen quart-size wide mouth amber Mason jars, so I needed a place to store them, preferrably something that would prevent dust from settling on the jars. I purchased a small Hefty storage container to store my blood pressure monitor a few weeks ago at Target and I was impressed with the variety of storage containers available at Target.
I estimated the dimensions of a dozen Mason jars lined up in rows of 3. I then headed to a local Target store and I found a Hefty 18-gal Max Pro storage tote that works perfectly.
 |  |
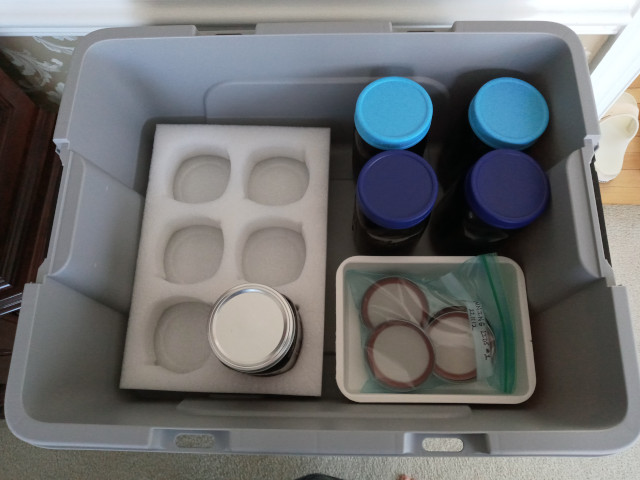 |
Note the packing cushion on the left in the above image. The packing cushion came with the Mason jars, so if you order some Mason jars be sure to save the bottom packing cushion. The packing cushion works wonderfully to prevent the jars from banging around in the container and it also provides a flat base upon which to place the jars. The Hefty 18-gal Max Pro storage tote has about a 3/4-inch wide recess that goes around the interior perimeter of the bottom.
11 – Recipe
11.01 – Recipe – Equipment |
- 64-oz Pyrex measuring cup
- 6 quart-size wide mouth amber canning jars with lids
- thermometer capable of measuring up to at least 250 degrees Fahrenheit
- 3-4 quart pan with lid, preferrably with pour spout(s) for easier pouring
- large metal or plastic spoon (wood spoons can harbor bacteria)
- 16-qt cooler (16-qt Igloo Playmate Elite coolers work perfectly)
- paper towels, small piece of fabric, or silicone mat to line the bottom of the cooler (optional)
- piece of fabric that can be used as an insulator if your cooler lid isn’t insulated
- blanket, towel, etc. to cover the cooler exterior (optional)
11.02 – Recipe – Ingredients |
- 1/2-gal whole fat milk, lactose-free if you’re lactose intolerant; reference 11.04 – Recipe – Additional Notes
- 2 capsules Solgar Advanced 40+ Acidophilus probiotic or your preferred probiotic; reference 11.04 – Recipe – Additional Notes
11.03 – Recipe – Directions |
- 01) Pour the milk into the 64-oz Pyrex measuring cup.
- 02) Microwave the milk for approximately 15.5 minutes (required time may vary due to differences in microwave ovens). The milk should be within a temperature range of 180-195 degrees Fahrenheit.
- 03) Remove any skin that has formed on the surface of the milk with the spoon and then transfer the milk to the pan.
- 04) Continue heating the milk on a stove within a temperature range of 180-195 degrees Fahrenheit for 10 minutes on low to medium-low heat, stirring frequently. Then turn off the heat.
- 05) Cover the pan with a lid, allowing the milk to cool until it falls within a range of 100-115 degrees Fahrenheit. The cooling period can take up to 2 hours or longer.
- 06) Initially, you should check the temperature of the milk periodically. Once you have a good idea of how long it takes for the milk to cool to the ideal temperature range, you can skip this step.
- 07) Once the milk reaches approximately 120 degrees Fahrenheit, you should begin preparing the hot water.
- 08) Heat 64-oz of hot tap water for approximately 2 minutes and 10 seconds in a microwave. The water temperature should be within the range of 130-140 degrees Fahrenheit.
- 09) Pour the water into two quart-size wide mouth canning jars, place lids on the jars, place the jars in the cooler, cover the jars with insulating fabric if your cooler lid isn’t insulated, and then close the cooler lid.
- 10) Repeat steps 08-09.
- 11) Once the milk has cooled within a temperature range of 100-115 degrees Fahrenheit, remove any skin that has formed on the surface of the milk with the spoon, open the probiotic capsules, empty the contents into the milk, and stir to mix thoroughly.
- 12) Pour the milk and probiotic solution into two quart-size wide mouth amber canning jars and securely place lids on the jars.
- 13) Place the quart jars of milk and probiotic solution between the jars of heated water in the cooler.
- 14) Cover the jars with an insulating fabric if your cooler lid isn’t insulated, close the cooler, and add an exterior insulating material to the exterior of the cooler if desired.
- 15) Allow the milk and probiotic solution to incubate for anywhere from 4 – 7.5 hrs or more, depending on desired thickness and tartness of yogurt. 7.5 hours of incubation time worked well for me.
- 16) After the incubation period, check the jars to make sure that you have yogurt; i.e. you shouldn’t have liquid sloshing around in the jars.
- 17) Place the jars of yogurt in the refrigerator for a few hours to chill and thicken more.
- 18) After a few hours, remove the yogurt from the refrigerator and remove the lids. Drain any excess condensation by tipping the jars over a sink and wipe any condensation from the lids.
- 19) Replace the lids and place the yogurt back in the refrigerator.
11.04 – Recipe – Additional Notes |
The canning jars used to store the yogurt don’t need to be sterilized as you might read in some posts or view in some videos. However, the jars should have been washed with soap and hot water at some point before use. All other equipment used in the yogurt making process should be clean as well.
To reduce the amount of whey that collects on the top of the yogurt as you use it, smooth the top of the yogurt with the back of a spoon before placing the jar back in the refrigerator.
You can use lactose free milk to make the yogurt if desired. However, the probiotics used to make the yogurt should consume most of the lactose in the milk.
In January 2023, I began having what I thought were symptoms of lactose-intolerance. I began using lactose free milk to make the yogurt and the yogurt turned out just as good as using regular milk. I learned a few months later that the regular milk I was using to make yogurt wasn’t the cause of my symptoms, so I’ve switched back to using regular milk. I can get organic grass-fed milk for a little more than I was paying for lactose free milk, which wasn’t organic or grass-fed.
In March 2024, I went online to the iHerb site to purchase another bottle of Solgar Advanced 40+ Acidophilus probiotic. Not only was the Solgar Advanced 40+ Acidophilus out of stock, but so were all of the Solgar probiotics. Therefore, I opted to purchase a bottle of the Lake Avenue brand (now California Gold Nutrition) of 10-strain blend probiotic. Lake Avenue is an iHerb house brand. My homemade yogurt turned out just as well as it did when using Solgar Advanced 40+ Acidophilus. An additional benefit is that the Lake Avenue 10-strain blend has more probiotic strains.
On November 28, 2024 at 8:38 a.m., I began incubating two quarts of yogurt. I usually allow the yogurt to incubate for 12-14 hours. I went to bed at 11:48 p.m., forgetting that I had yogurt incubating.
I got out of bed at 1:19 p.m. the following day and while sitting on the toilet, I remembered the yogurt. Would it still be good? As soon as I got down on the main level of our home, I took the yogurt out of the incubation cooler and I opened both jars. The yogurt looked and smelled okay, so I opted to keep it. I placed both jars in the refrigerator.
I consumed both jars of yogurt in December 2024 without any ill effects. So even though the yogurt was in the incubation cooler for twenty-eight hours and forty-one minutes, it was still good.
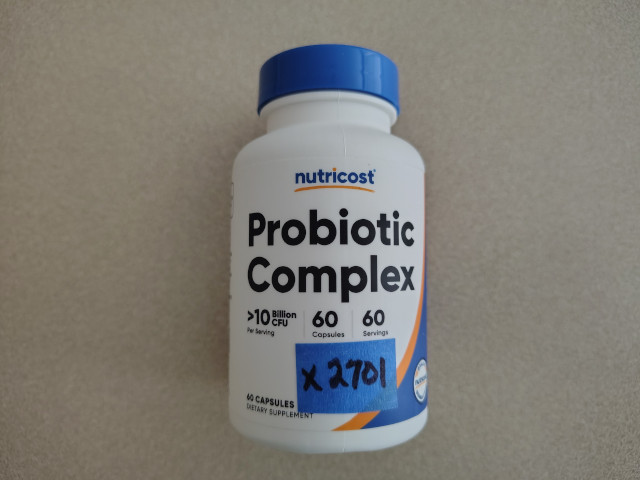
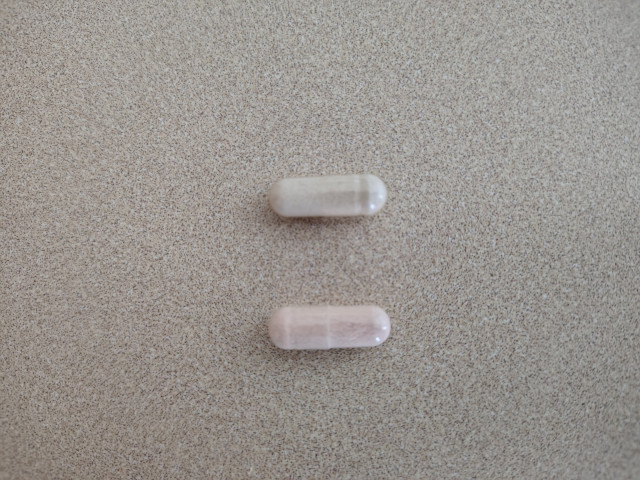
In June 2025, I decided to purchase Nutricost Probiotic Complex for making yogurt. I didn’t finish the last bottle of probiotic that I purchased in 2024 until August, 2025. When I opened the bottle of Nutricost Probiotic Complex, I noticed that the contents of the capsules were a different color. The color of the capsule contents of the probiotics that I have previously purchased was light pink. The color of the contents of the capsules of Nutricost Probiotic Complex was an off-white.
 |
 |
I attempted to make two quarts of yogurt using the Nutricost Probiotic Complex. When I opened the jars after twenty plus hours of incubation, I discovered that the batch was a total failure. The jars still contained liquid milk.
I raised the temperature of our water heater days before I attempted to make my first batch of yogurt using Nutricost Probiotic Complex, so I thought the increased tap water temperature might have been the issue. I attempted to make just a quart of yogurt for a second attempt, but I didn’t heat the water as long as I normally have done in the past. However, my second attempt at making yogurt with Nutricost Probiotic Complex also failed.
I did some Internet research to find out what the difference was in different-colored probiotics. Based on my research there isn’t a difference as far as one being more beneficial than another. However, clearly based on my experience there appears to be a difference when it comes to using probiotics for making yogurt.
12 – Conclusion
I was elated when my first quart of yogurt was a success. Now I can make my own yogurt for much cheaper than what I’ve paid for it in the store and I don’t have to worry about any more out-of-stock experiences. My homemade yogurt tastes much better than store-bought yogurt as well. If you have any questions or comments, leave them in the Comment box at the bottom of the page and thank you for visiting.
13 – Solgar Advanced 40+ Acidophilus Health Benefits
Solgar Advanced 40+ Acidophilus contains 5 probiotic strains: Lactobacillus acidophilus, Lactobacillus rhamnosus, Lactobacillus paracasei, Bifidobacterium lactis, and Streptococcus thermophilus. I did a bit of Internet research to learn about the health benefits of the 5 probiotic strains.
Lactobacillus acidophilus
9 Ways Lactobacillus Acidophilus Can Benefit Your Health
What Is Lactobacillus Acidophilus?
Lactobacillus rhamnosus
7 Things Lacticaseibacillus rhamnosus Is Good for
Lactobacillus rhamnosus: A Probiotic With Powerful Benefits
Lactobacillus paracasei
L. paracasei – A common probiotic strain
The Health Benefits of Lactobacillus Paracasei
Why You Should Use the Probiotic Lactobacillus Casei
Bifidobacterium lactis
Bifidobacterium lactis – A Probiotic Species with an Extraordinary, Nurturing Personality
The Bacterium that Could Help You Lose Weight & Fight Inflammation
Why Bifidobacteria Are So Good for You
Streptococcus thermophilus
The Health Benefits of Streptococcus Thermophilus
Streptococcus thermophilus: A Surprisingly Warm Probiotic
Streptococcus Thermophilus: Key Health Benefits
14 – Useful Resources
In alphabetical order by title:
- Easy Way to Make Homemade Yogurt (with fewer dishes!), The, Jill Winger – Old Fashioned on Purpose YouTube Channel
- Homemade Yogurt: You Might Be Doing It Wrong, Nicole Easterday, Farm Curious
- How to Make Yogurt – No Machine Required, Mary’s Nest YouTube Channel
- Make Your Own Yogurt, BC Dairy
- Making Yogurt, Salad in a Jar
- Science of Great Yogurt, The, Brod & Taylor
- Slow Cooker Yogurt, Hanna, Cornell Cooperative Extension of Jefferson County
- Ways to Make Yogurt Without Starter Culture, Diane Miles, Yogurt Nerd
Equipment icon courtesy of Icons8.
Ingredients icon courtesy of Icons8.
Directions icon courtesy of Icons8 via IconArchive.
Additional Notes icon courtesy of IconsMind via IconArchive.
2022-013