
Installing and Maintaining Debian Unstable
Updated on 2025-08-23
Contents
- 1 – Introduction
- 2 – Things to Consider Before Deciding to Use Debian Unstable
- 3 – Debian Unstable Installation
- 4 – Desktop Environment Installation
- 5 – System Upgrades
- 5.01 – Normal Full-Upgrade
- 5.02 – Packages Flagged as No Longer Required (Autoremovals)
- 5.03 – Kernel Upgrades
- 5.04 – Problematic Full-Upgrade – Package Bug Encountered
- 5.05 – Problematic Full-Upgrade – Holding a Package Results in Undesired Packages to Be Removed or Packages Being Undesirably Flagged as No Longer Required
- 5.06 – Problematic Full-Upgrade – Undesired Packages to Be Removed or Packages Being Undesirably Flagged as No Longer Required
- 5.07 – Persistent Proposed Package Removals
- 5.08 – Transitions
- 5.09 – Downgrading a Buggy Package
- 5.10 – After a New Debian Stable Release
- 5.11 – Purging the Package Cache
- 6 – Conclusion
- 7 – Useful Resources
1 – Introduction
Debian Unstable, also known as Debian Sid (Sid being the Toy Story character who likes to destroy toys), is part of the development process for Debian Stable. Packages typically flow in the following order during the Debian Stable development process:
- Experimental
- Unstable
- Testing
- Stable
Approximately every two years, development is frozen and eventually Debian Testing becomes the next Debian Stable release.
While the primary purpose of Debian Unstable is for the development of the next Debian Stable release, it can also be used as a daily operating system. Used as a daily operating system, Debian Unstable is considered to be a rolling release. In other words, unless the installation breaks, you should never have to install it again. However, you need to know quite a bit about maintaining Debian Unstable as it is prone to breaking if you don’t know how to use and maintain it.
My first encounter with Debian Unstable was when a user who went by the username machinebacon (real name Julius Hader) in the CrunchBang Linux forums put together a tutorial on running CrunchBang Linux using Debian Unstable. I was intrigued with running CrunchBang Linux using Debian Unstable because Debian Unstable had newer packages, or as they used to say in the CrunchBang Linux forums, new shiny stuff.
When I first published this post, I decided not to provide details on installing desktop environments, other than the mention about my post covering a Openbox window manager and Tint2 panel setup. However, I eventually decided that lack of such details resulted in my post being less useful. Additionally, my curiosity got the best of me, so I spent quite a bit of time over a span of months from 2022-2023 installing a number of desktop environments under a Debian Unstable installation running under VirtualBox. I learned quite a bit by installing the different desktop environments.
In this tutorial, I will detail how to install Debian Unstable, including desktop environments, and I will also provide tips on maintaining Debian Unstable.
2 – Things to Consider Before Deciding to Use Debian Unstable
Debian Unstable is not difficult to use and maintain once you become proficient with both activities. However, you should have some Linux experience, particularly experience with using Debian Stable, before deciding to use Debian Unstable. This consideration is particularly applicable to new Linux users.
Security updates for packages in the Debian Unstable repositories are not provided by the Debian Security Team. Any security patches are acquired from the package maintainer. Therefore, it’s possible to obtain packages under Debian Unstable that have security issues.
By its very nature, Debian Unstable is prone to breakage. It is advisable not to perform a system upgrade if you need to use Debian Unstable to get something important done the same day. However, this consideration is not as important once you become proficient at maintaining and troubleshooting package installation and/or package upgrade issues under Debian Unstable.
The result of installing Debian Unstable is a barebones system; i.e. you will not have a desktop environment or any applications other than the command line Nano and Vim text editors. Therefore, you should be comfortable with working on the command line.
If you’re a fan of the Openbox window manager and the Tint2 panel, reference this post to setup a usable system. I will provide details on installing other desktop environments after I provide details on installing Debian Unstable.
For those who would rather not go through the trouble of performing a Debian network installation, upgrading the installation to Debian Unstable, and then installing a desktop environment and applications, check out the the Siduction Linux distribution.
Siduction is based on Debian Unstable, with a customized kernel, scripts, tools, and documentation available in the Siduction repository. Siduction is currently available with the following desktop environments: Cinnamon, Gnome, KDE, LXDE, and XFCE. Additionally, the development team also offers an installable version with no GUI called NoX (no X Window System) and an Xorg (X Window System) version, which I assume is very similar to a Debian minimal system.
If you opt to install Siduction, insure that apt-listbugs is installed. Everything in section 5, covering system upgrades, of this tutorial will also work under Siduction since it is based on Debian Unstable.
3 – Debian Unstable Installation
The Debian recommended method of creating a Debian Unstable installation is to use a current Debian Stable installer to create a minimal system; i.e. no desktop, no programs. I’m not going to cover the installation of Debian Stable in this tutorial. Feel free to check out my tutorial on installing a Debian Stable minimal system using the network installation method. This tutorial assumes you have already installed a minimal Debian Stable system.
To upgrade your Debian Stable minimal system to Debian Unstable, you will do two things. First, you need to change the applicable apt sources file. In my tutorial on installing a Debian Stable minimal system using the network installation method, I suggested creating a file named debian.list under the /etc/apt/sources.list.d folder as a replacement for /etc/apt/sources.list. Enter the following command on the command line:
– or –
Change whatever is in the existing file to read as follows:
deb [repository address] unstable main contrib non-free non-free-firmware
# deb-src [repository address] unstable main contrib non-free non-free-firmware
Save your changes (CTRL-O) and then exit Nano (CTRL-X).
Now upgrade your system to Debian Unstable using the following commands:
sudo apt full-upgrade
That’s it! Once the upgrade has completed, you’ll have a Debian Unstable minimal system. However, there are two programs that I recommend installing in addition to whatever other programs you plan to install; apt-listbugs and apt-listchanges. apt-listchanges should be installed by default. To install apt-listbugs:
apt-listbugs will check for bug reports for any packages about to be installed or upgraded, providing you the opportunity not to install or upgrade the package if you deem the bug to be applicable and severe enough. I will cover more about making that determination later in this tutorial, as well as how to prevent an unwanted upgrade.
apt-listchanges will notify you of important changes to an upgraded package when applicable.
3.01 – Debian Unstable Installation – Disable Automatic Removal of Old Kernels
On 01/08/2021, the upgrade to apt version 2.1.16 introduced new functionality to automatically remove old kernels. I recommend disabling the automatic removal of old kernels as follows:
- Locate the line VersionedKernelPackages.
- Place a hashtag (#) in front of “linux-.*”;.
- Save your changes; CTRL-O.
- Exit Nano; CTRL-X.
The above tip is courtesy of a forum member who goes by the username devil on the Siduction forums.
Why do I recommend disabling the removal of old kernels? Because a newer kernel has the potential of causing issues with your computer, especially if it is an older computer.
3.02 – Debian Unstable Installation – Enable GRUB OS Prober
With the GRUB v2.06-1 upgrade in late November 2021, boot menu entries for other operating systems are no longer generated by default; a ridiculous default in my opinion. To re-enable the generation of boot menu entries for other operating systems, enter the following on the command line:
1. Go to the bottom of the file, add another new line (one should already exist), and enter the following:
# Your comment of choice
GRUB_DISABLE_OS_PROBER=false
2. Make sure there is a blank line following the last line above.
3. Save your changes; CTRL-O.
4. Exit Nano; CTRL-X.
5. Then enter the following on the command line:
4 – Desktop Environment Installation
In this section, I provide details on how to install a number of desktop environments available via the Debian repositories by using a metapackage; reference the Metapackages section of this post in the Debian user forums. You should only install one desktop environment unless you have experience with installing more than one.
With the exception of the Cinnamon, Gnome, and KDE desktop environment metapackages, installing a desktop environment metapackage will only result in a desktop environment and maybe a handful or less of usable applications. In other words, no productivity applications will be installed; e.g. office suite, graphic editor, audio player, video player, etc. You need to know which applications you want to install and how to install them.
4.01 – Desktop Environment Installation – Budgie
The Budgie Desktop metapackage installs the Budgie desktop environment with almost no applications. The Budgie Desktop metapackage install takes up quite a bit of disk space for not having almost no applications. You’ll need to install additional applications for a more usable computer; e.g. an office suite, audio and video player, graphics program, file manager, etc. Installing the Budgie Desktop metapackage will take up approximately 1.283GB of disk space.
To install the Budgie Desktop metapackage, enter the following on the command line:
I included the following applications to provide a more user-friendly experience:
- Featherpad – easy-to-use graphical text editor
- LightDM – display manager that provides an easy-to-use graphical login screen
- PCManFM – graphical file manager
- Terminator – terminal emulator for command line usage
Feel free to substitute your preferred applications for any of the aforementioned if desired.
Once installation of the Budgie Desktop metapackage and the additional applications have completed, reboot your computer by entering the following on the command line:
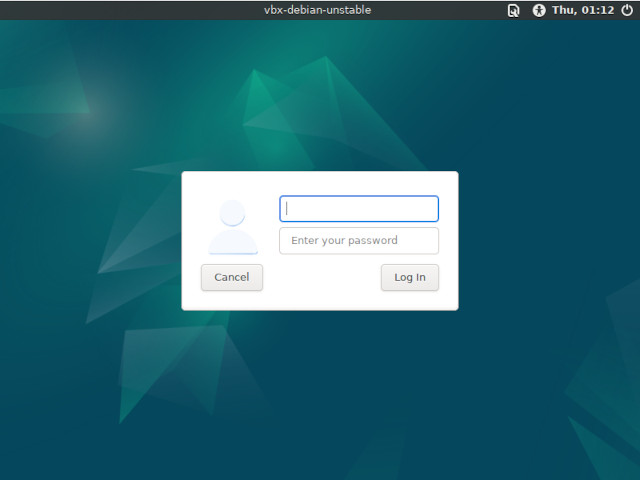
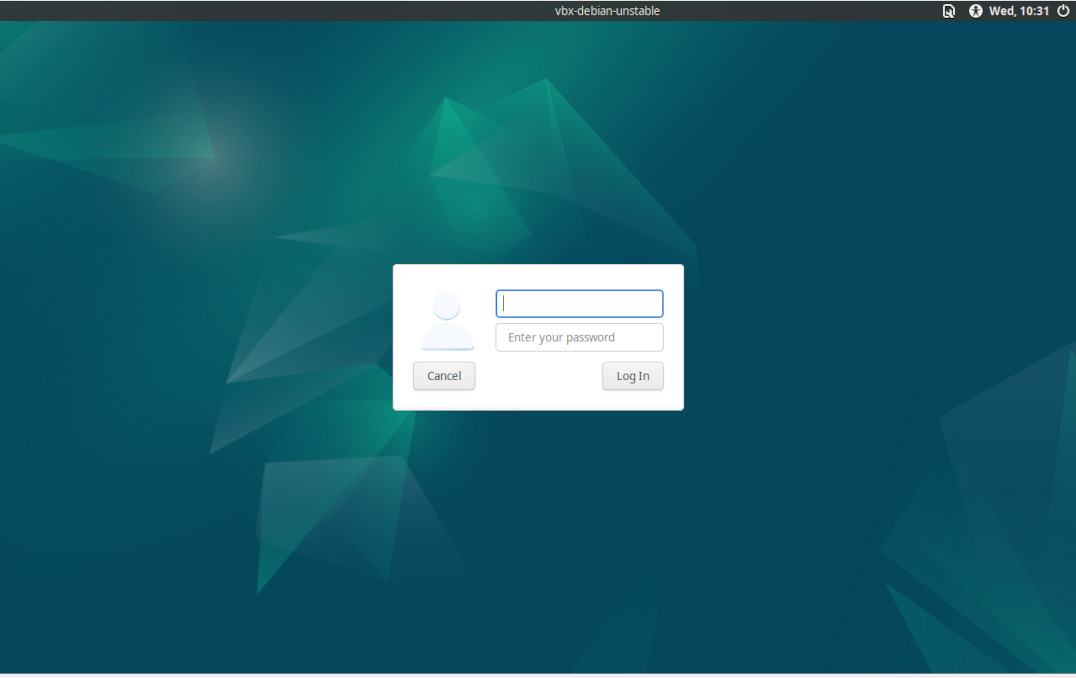
Upon a reboot of your computer, you should be presented with the LightDM login screen.
Prior to logging in for the first time, you need to click the wrench icon in the upper right and change the session from Default Xsession to Budgie Desktop.
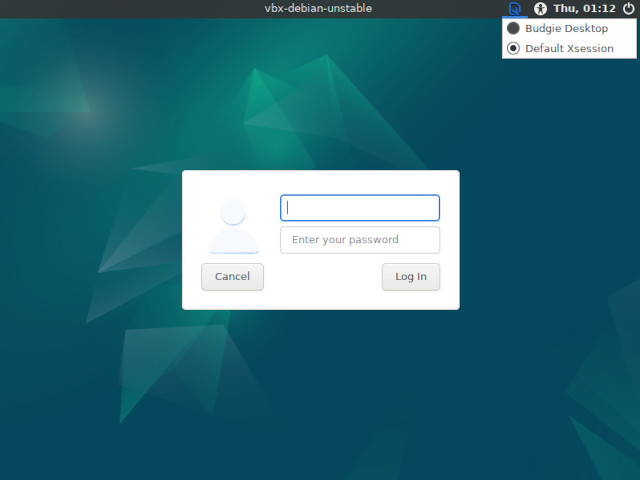
After selecting Budgie Desktop, the wrench icon should change to a bird icon.
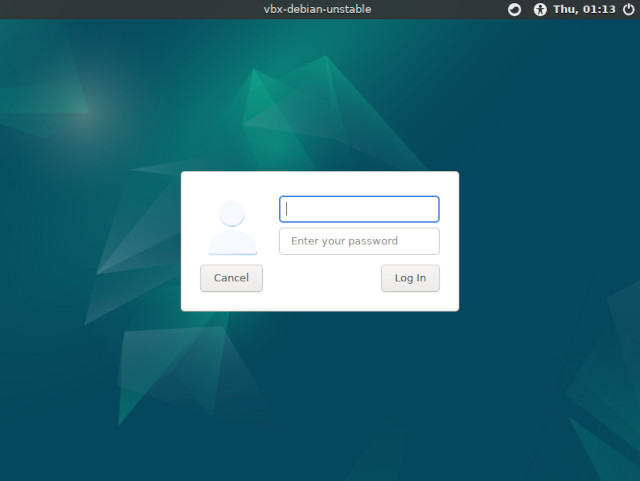
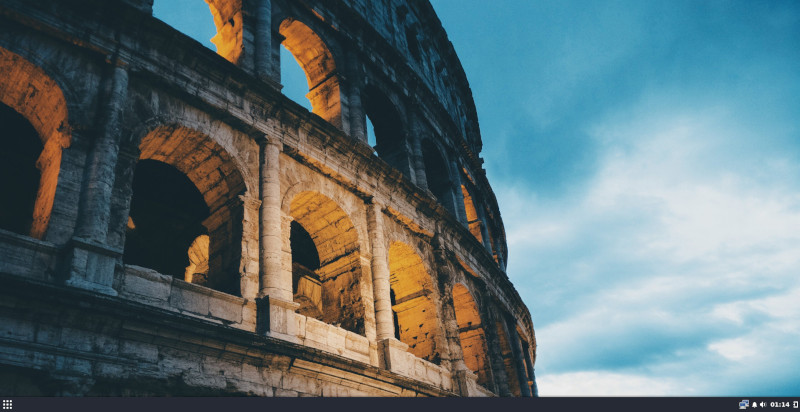
Now enter your username and password to login. Once you successfully login, you should be presented with the Budgie desktop.
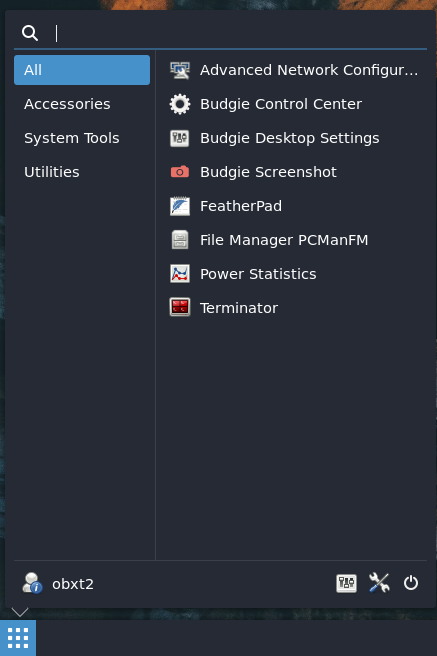
The Budgie start menu, accessible from the lower left of the desktop.
The Budgie end session dialogue, accessible from the start menu on the lower left of the desktop or from the end session icon on the far lower right of the desktop.

Now you can begin installing additional applications of your choice via the command line under Terminator or your preferred terminal emulator to create a more usable computer.
4.02 – Desktop Environment Installation – Cinnamon
The Cinnamon Desktop Environment metapackage installs the Cinnamon desktop environment along with a number of additional user applications to provide a very usable computer upon installation completion. Installing the Cinnamon Desktop Environment metapackage will take up approximately 3.824GB of disk space.
To install the Cinnamon Desktop Environment metapackage, enter the following on the command line:
Once installation of the Cinnamon Desktop Environment metapackage has completed, reboot your computer by entering the following on the command line:
Upon a reboot of your computer, you should be presented with the LightDM login screen.
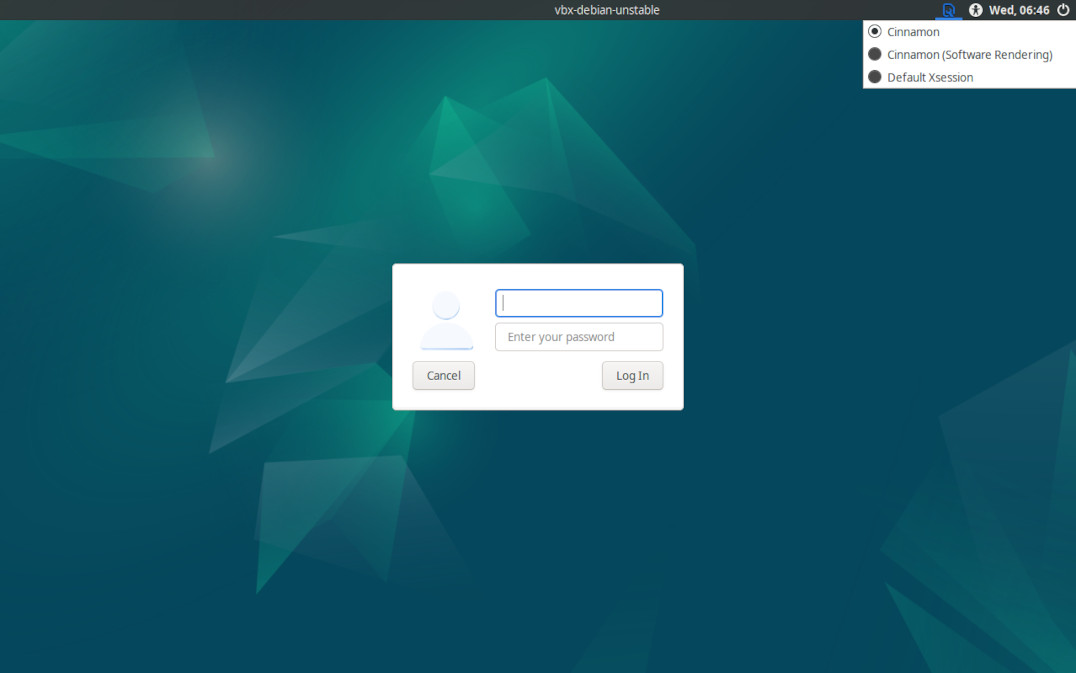
Prior to logging in for the first time, you should click the wrench icon in the upper right and change the session from Default Xsession to Cinnamon.
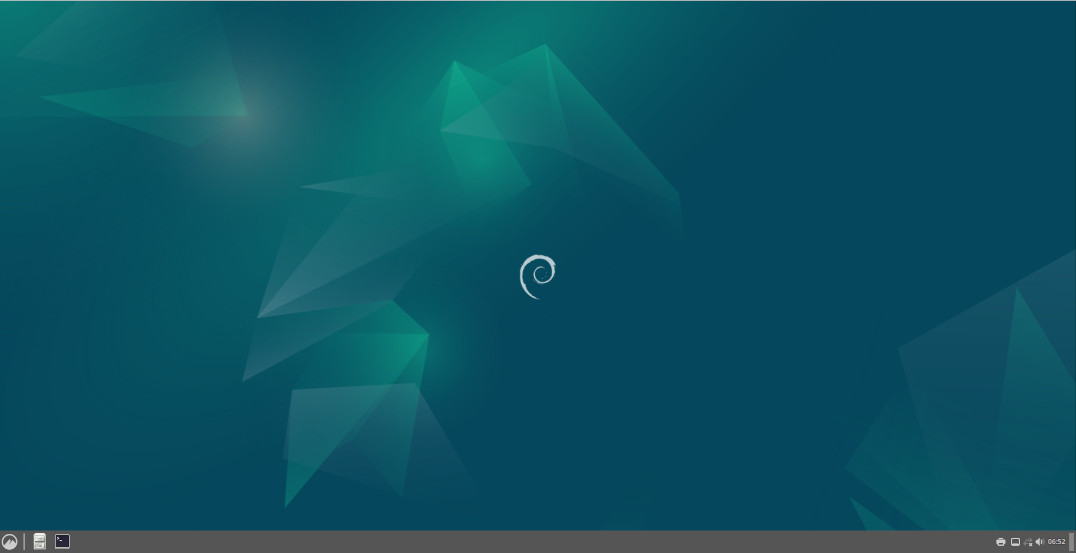
Now enter your username and password to login. Once you successfully login, you should be presented with the Cinnamon desktop.
The start menu under the Cinnamon desktop, accessible from the lower left of the desktop.
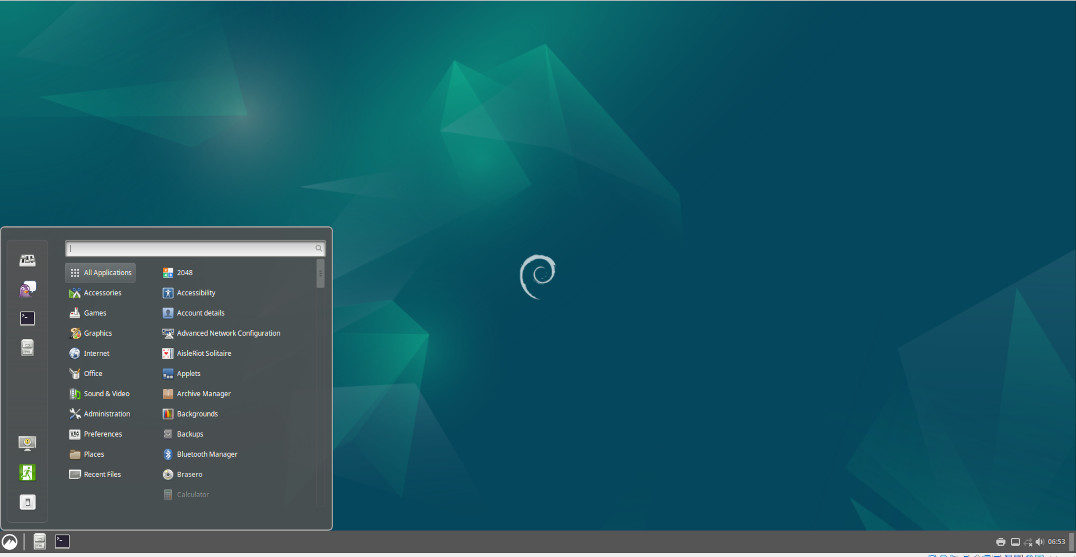
Options available from the Quit window, accessible from the start menu.
4.03 – Desktop Environment Installation – Gnome
The Gnome metapackage installs the Gnome desktop environment along with a number of additional applications to provide a very usable computer upon installation completion. Installing the Gnome metapackage will take up approximately 3.058GB of disk space.
To install the Gnome metapackage, enter the following on the command line:
Once the Gnome metapackage installation has completed, reboot your computer by entering the following on the command line:
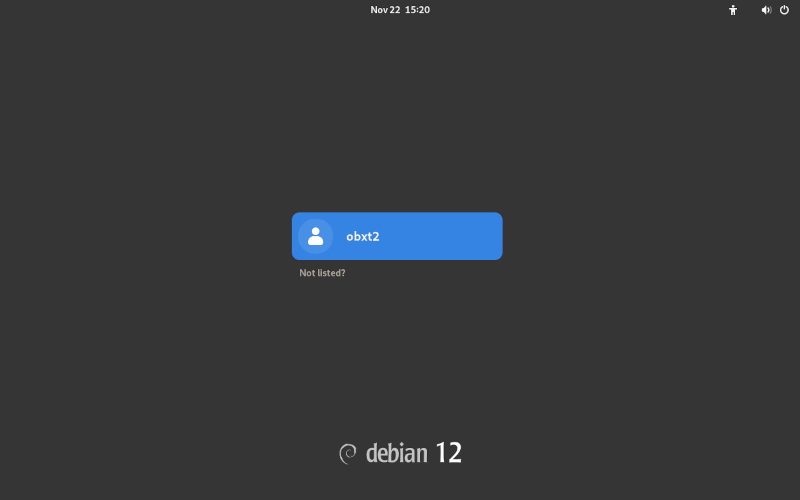
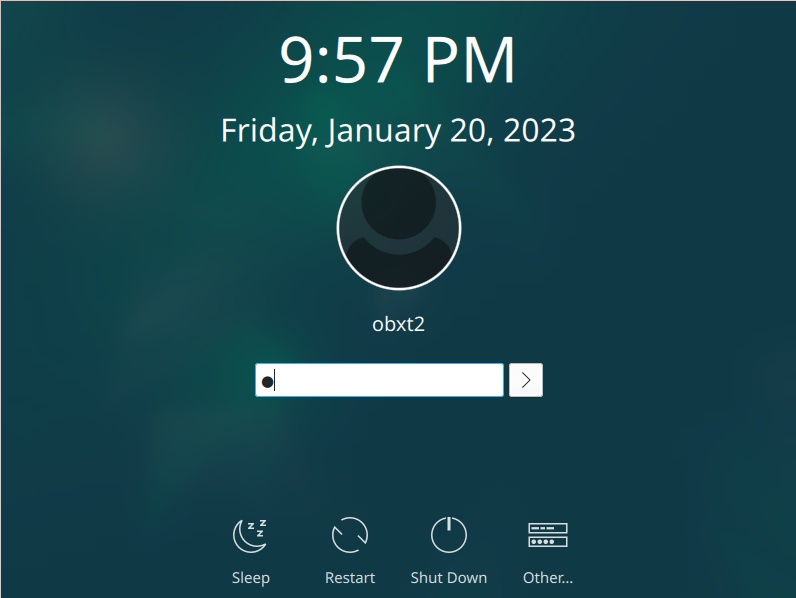
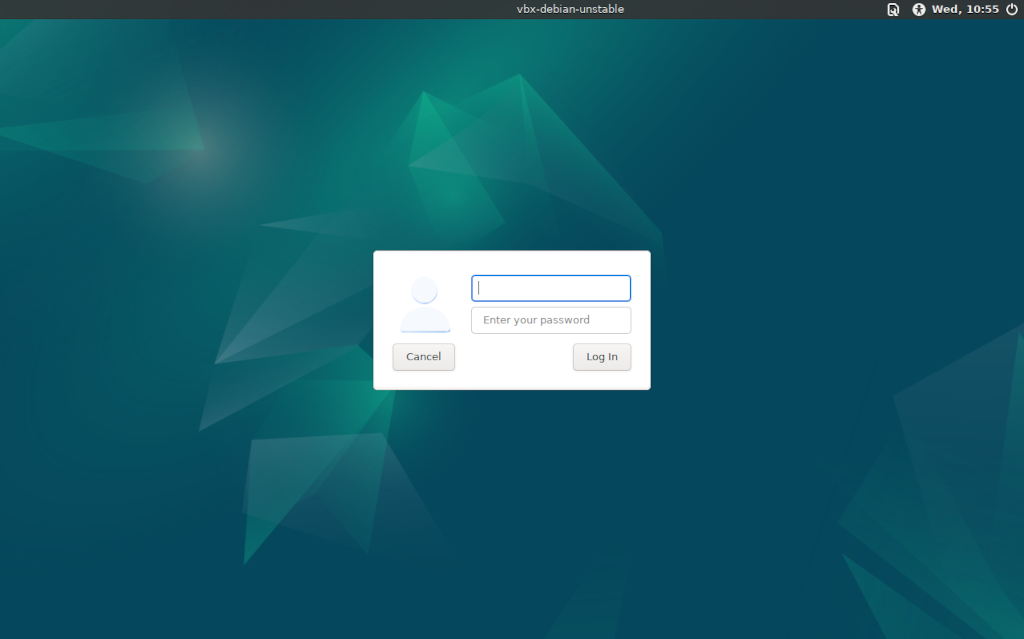
Upon a reboot of your computer, you should be presented with the SDDM login screen. You’ll need to select your user name.
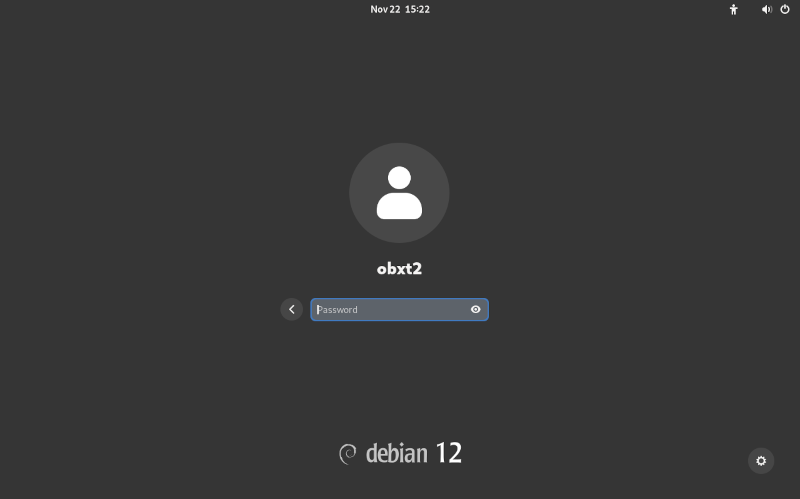
After selecting your user name, enter your password to log in.
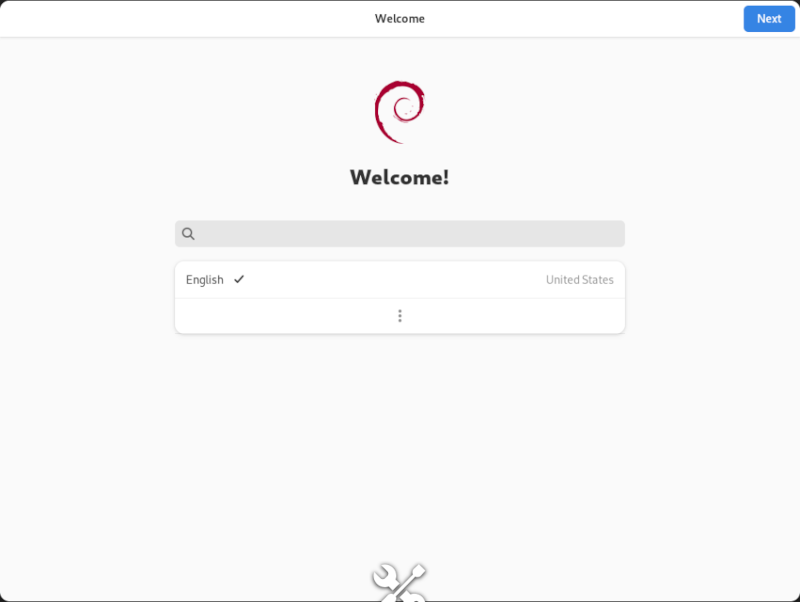
Upon successful login the first time, you’ll be asked to complete a number of selection options. First, you’ll be asked to select your preferred language.
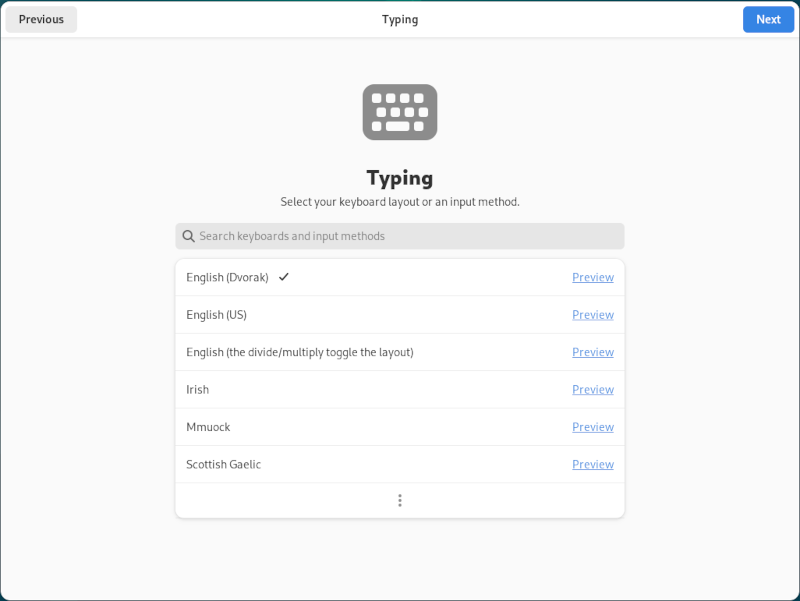
Second, you’ll be asked to select your preferred keyboard layout.
Third, you’ll be asked whether or not to enable location services.

Finally, you’ll be asked to connect your online accounts.

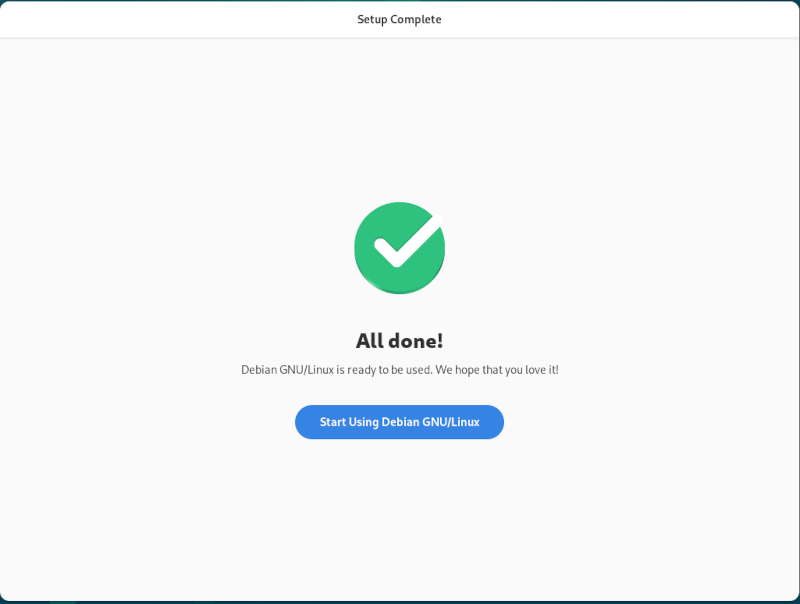
You’ll receive confirmation upon completing the setup options.
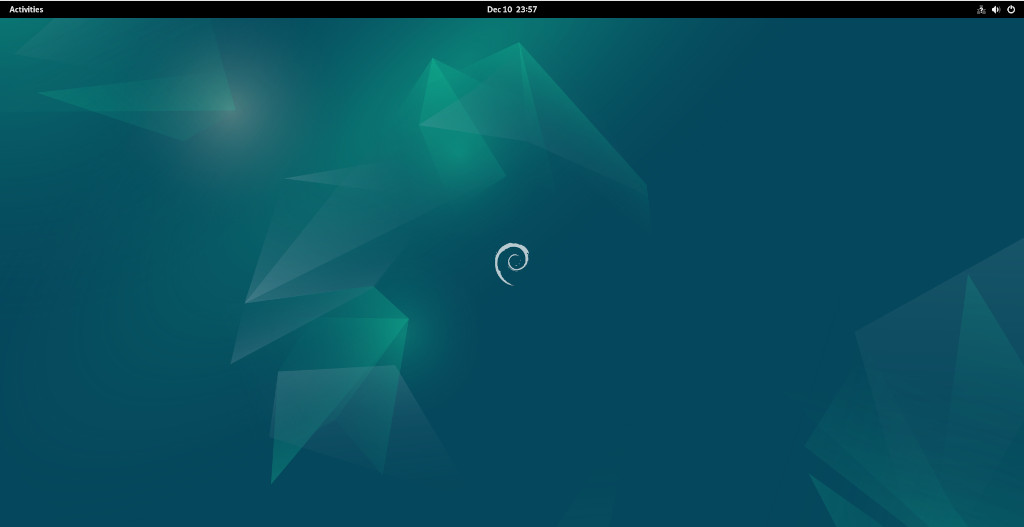
The Gnome desktop.
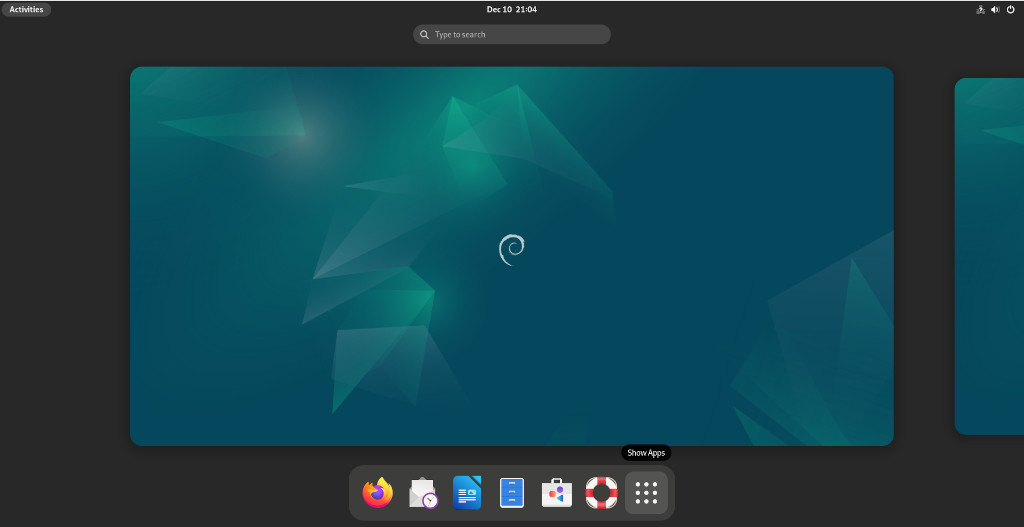
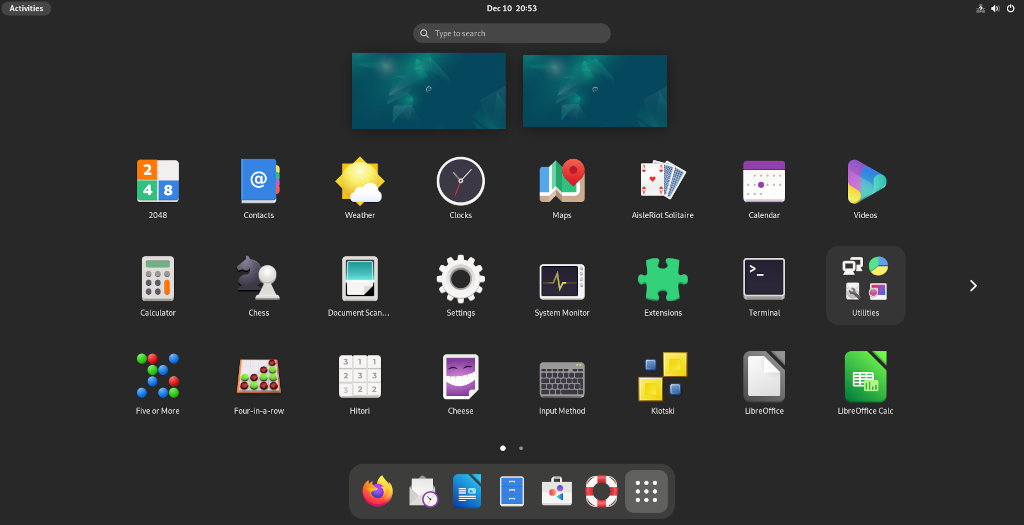
The Gnome desktop with the Activities bar activated.

To display the Applications pages or views, click the the icon on the far right after activating the Activities bar.
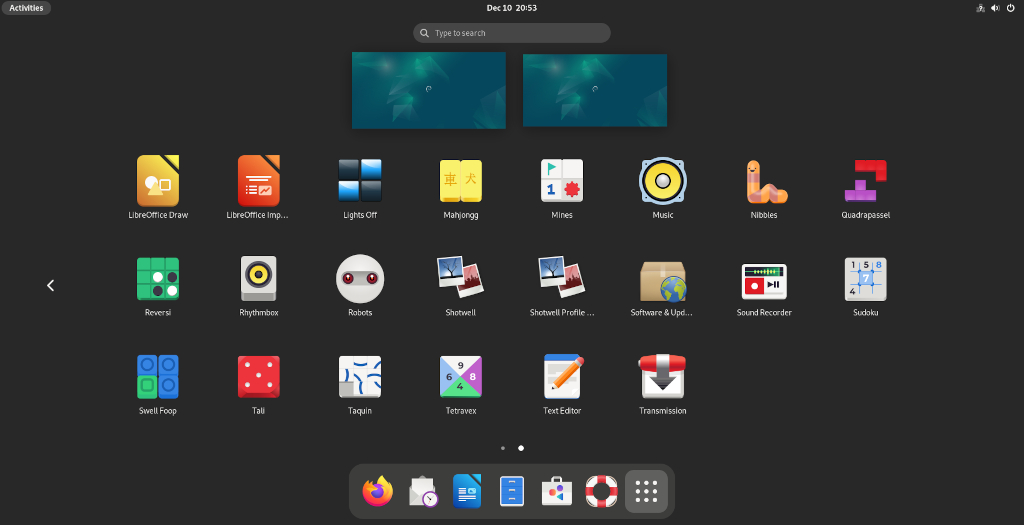
Gnome Applications Overview:
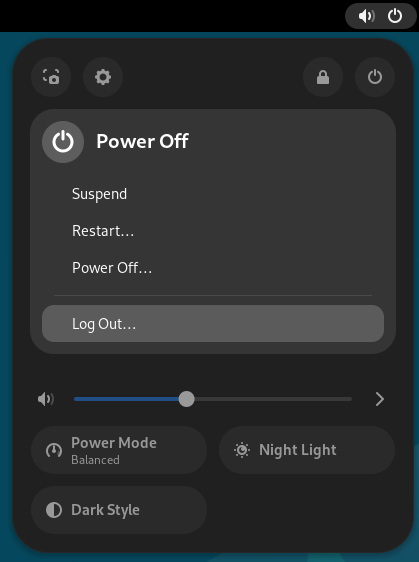
Following are the options available when powering off, accessible via the power button icon at the top far right of the desktop.
4.04 – Desktop Environment Installation – KDE
The KDE Standard metapackage installs the KDE Plasma desktop environment and a standard set of applications. There is no office suite installed by default; e.g. LibreOffice. Installing the KDE Standard metapackage will take up approximately 3.473GB of disk space.
To install the KDE Standard metapackage, enter the following on the command line:
Once the KDE Standard metapackage installation has completed, reboot your computer by entering the following on the command line:
Upon a reboot of your computer, you should be presented with the SDDM display manager login screen.
Upon successful login, you should be presented with the KDE Plasma desktop.
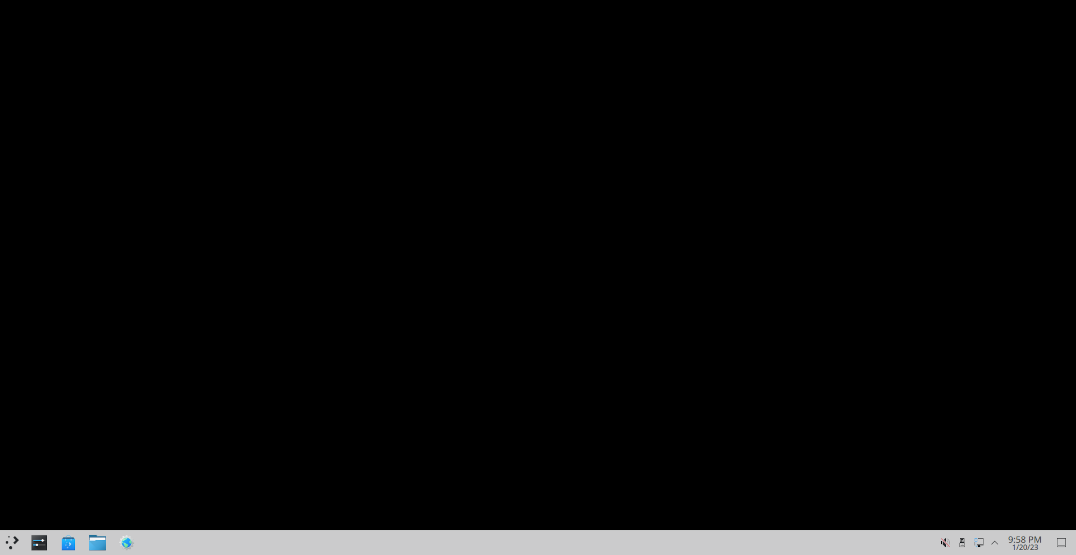
Click the icon with three dots and the greater-than sign in the lower left corner to activate the applications menu.
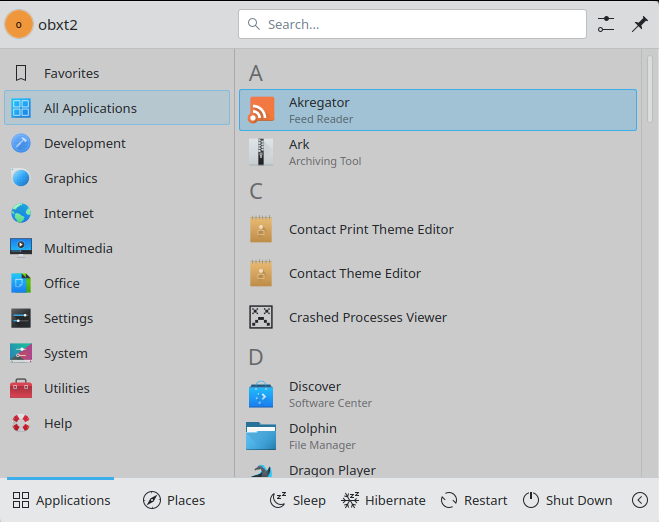
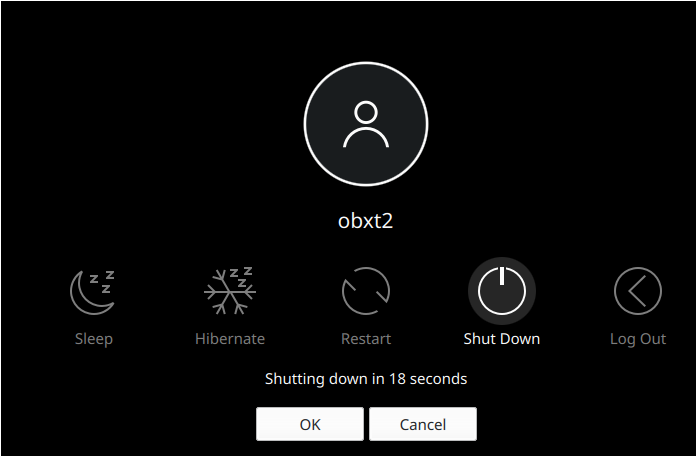
Following is the shutdown screen, accessible from the applications menu.
4.05 – Desktop Environment Installation – LXDE
The LXDE metapackage installs the LXDE desktop environment along with a few user applications. However, you’ll need to install additional user applications to make the desktop experience more useful. Installing the LXDE metapackage will take up approximately 1.761 GB of disk space.
To install the LXDE metapackage, enter the following on the command line:
Once the LXDE metapackage installation has completed, reboot your computer by entering the following on the command line:
Upon a reboot of your computer, you should be presented with the LightDM login screen.
Prior to logging in for the first time, you should click the wrench icon in the upper right and change the session from Default Xsession to LXDE.
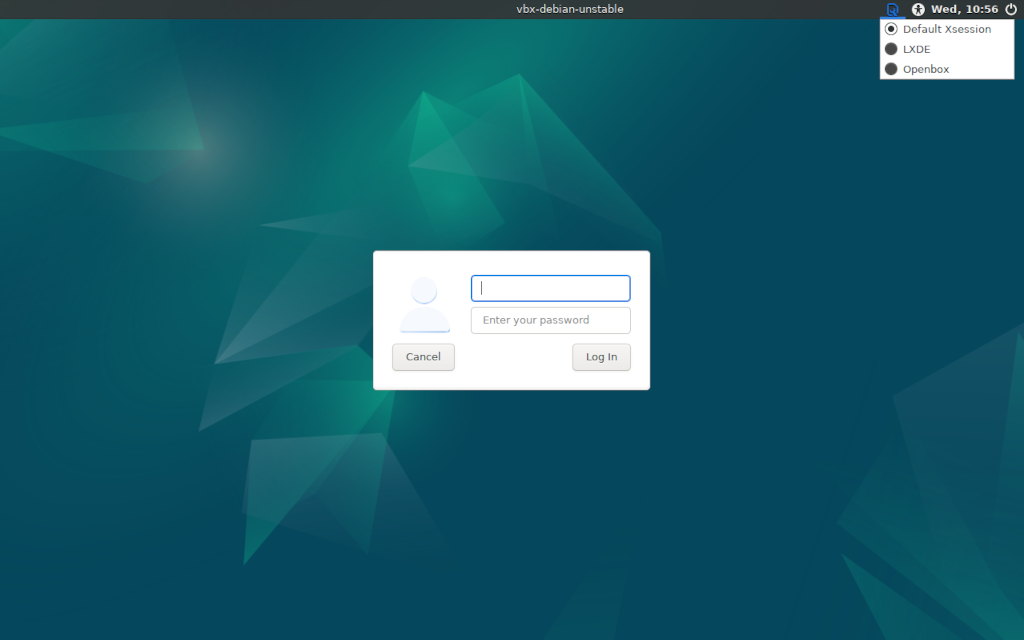
After selecting the LXDE session, the gear icon in the upper right should change to a bird-like icon.
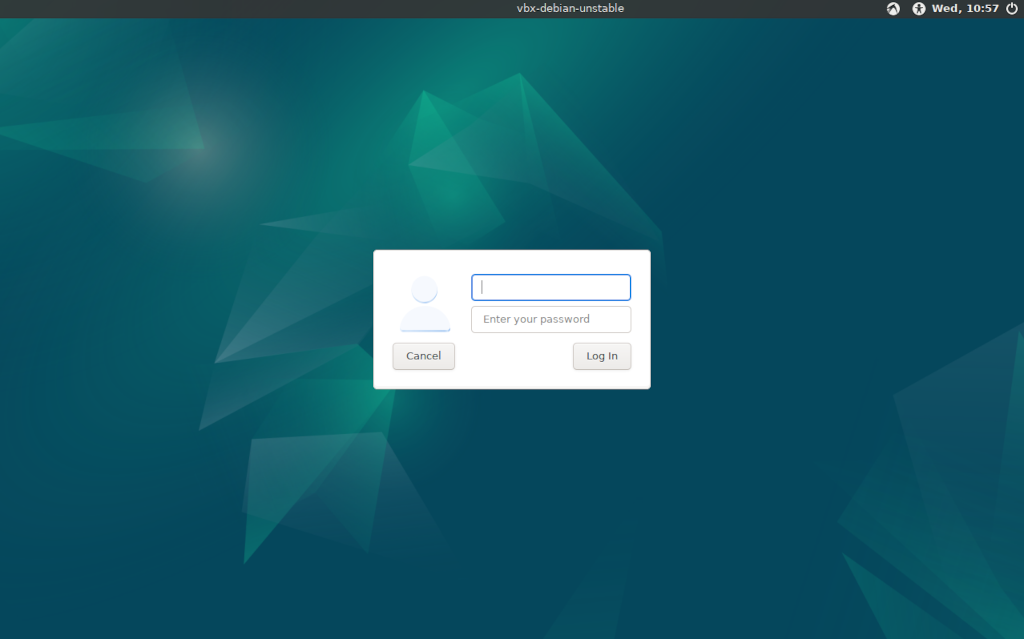
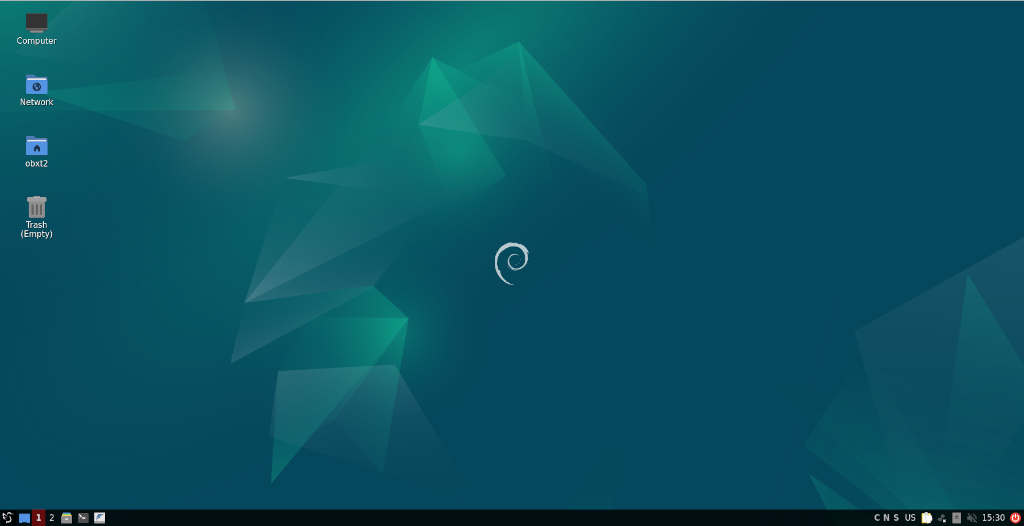
Enter your user name and password and click the Log In button. Upon successful login, you should be presented with the LXDE desktop.

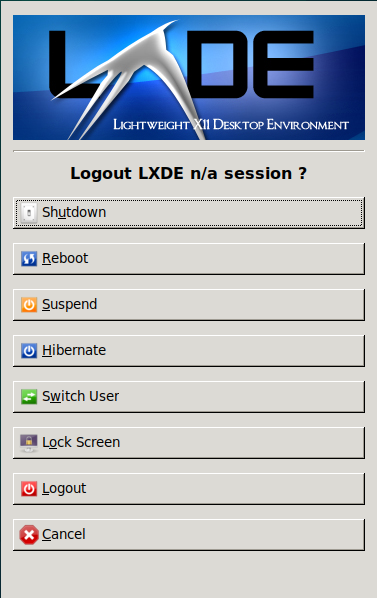
Click the bird-like icon in the lower left corner to activate the applications menu.

Logout options available, accessible from the start menu.
4.06 – Desktop Environment Installation – LXQt
The LXQt metapackage installs the LXQt desktop environment with enough applications to make a fairly usable computer. The only applications that aren’t installed that you may want are an office suite and an image editor. Installing the LXQt metapackage will take up approximately 2.584 GB of drive space.
To install the LXQt metapackage, enter the following on the command line:
Once the LXQt metapackage installation has completed, reboot your computer by entering the following on the command line:
Upon a reboot of your computer, you should be presented with SDDM login screen.

Upon successful login, you should be presented with the LXQt desktop.
Click the swan-like icon in the lower left corner to activate the start menu.
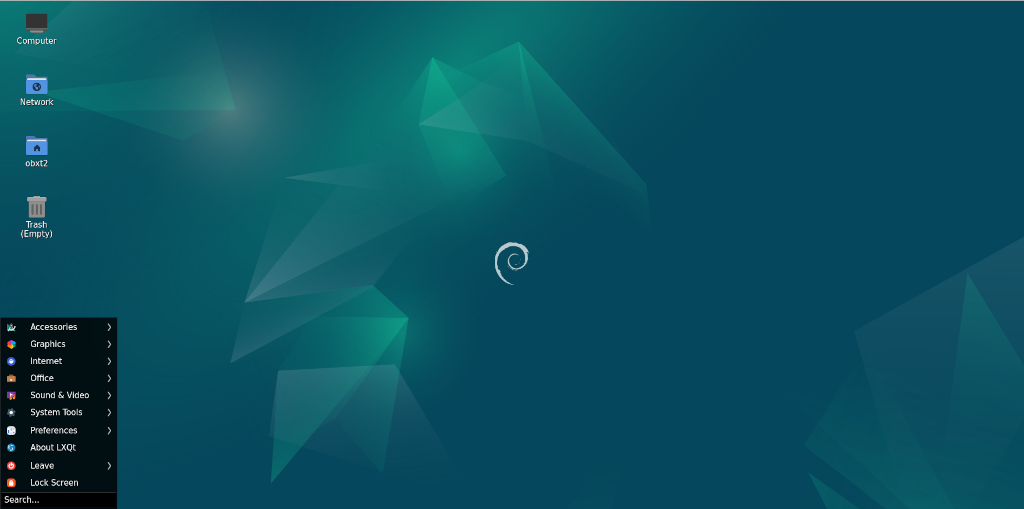
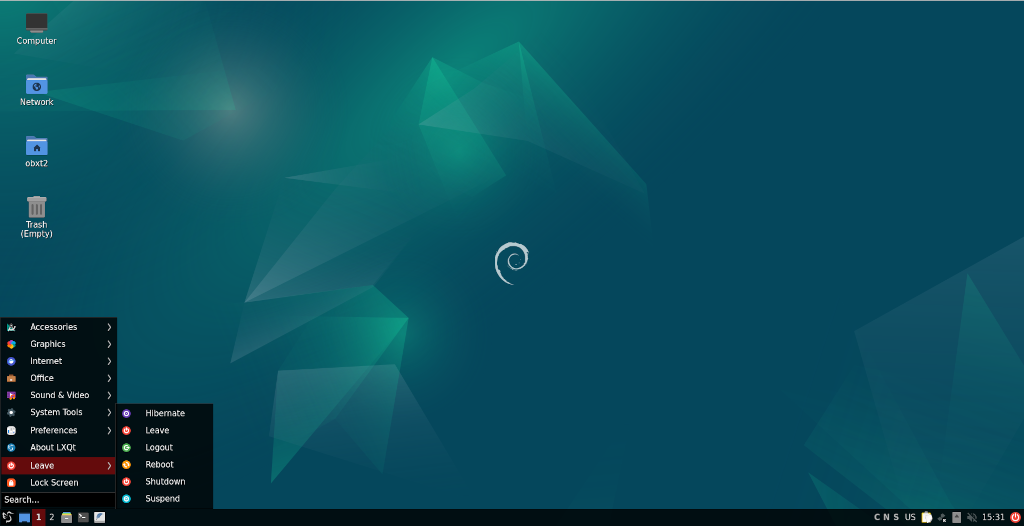
Power off options available using the start menu.
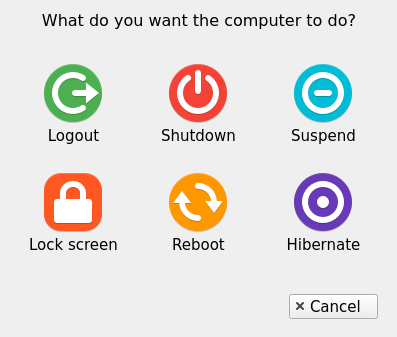
Power off options available using the red power button in the far lower right corner.
4.07 – Desktop Environment Installation – Mate
The Mate Desktop Environment Extras metapackage installs the Mate desktop environment with a few user applications. However, you’ll need to install additional user applications to make the desktop experience more useful. Installing the Mate Desktop Environment Extras metapackage and a display manager will take up approximately 1.805 GB of drive space.
To install the Mate Desktop Environment Extras metapackage, enter the following on the command line:
I included the following applications to provide a more user-friendly experience:
- LightDM: display manager that provides an easy-to-use graphical login screen
Once the Mate Desktop Environment Extras metapackage and LightDM installation has completed, reboot your computer by entering the following on the command line:
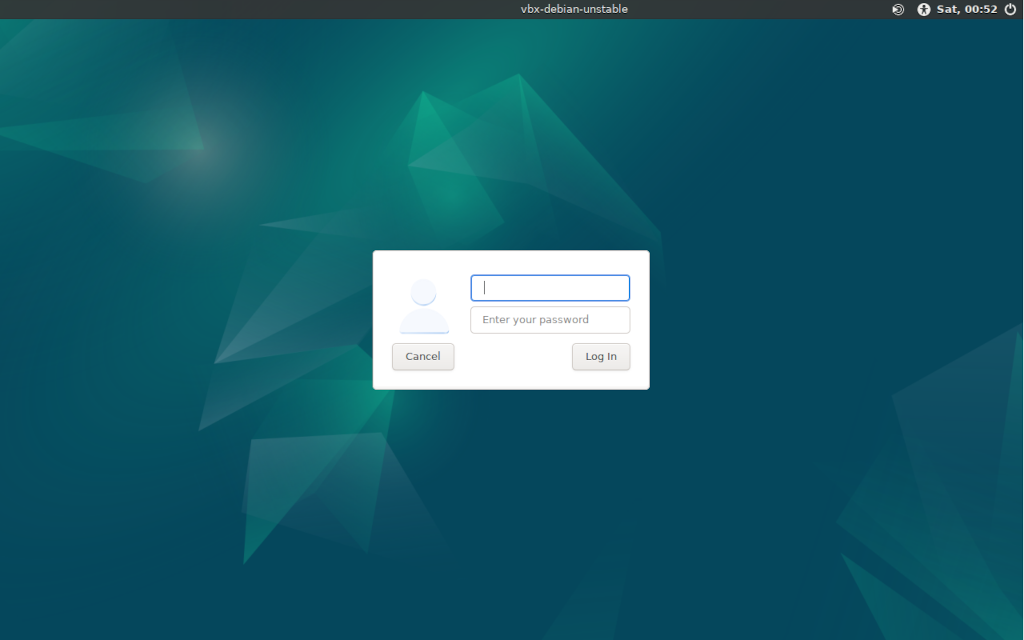
Upon a reboot of your computer, you should be presented with the LightDM login screen.

To initially login to the Mate desktop environment, you’ll need to click the wrench icon in the upper right hand corner and then select the MATE session option.
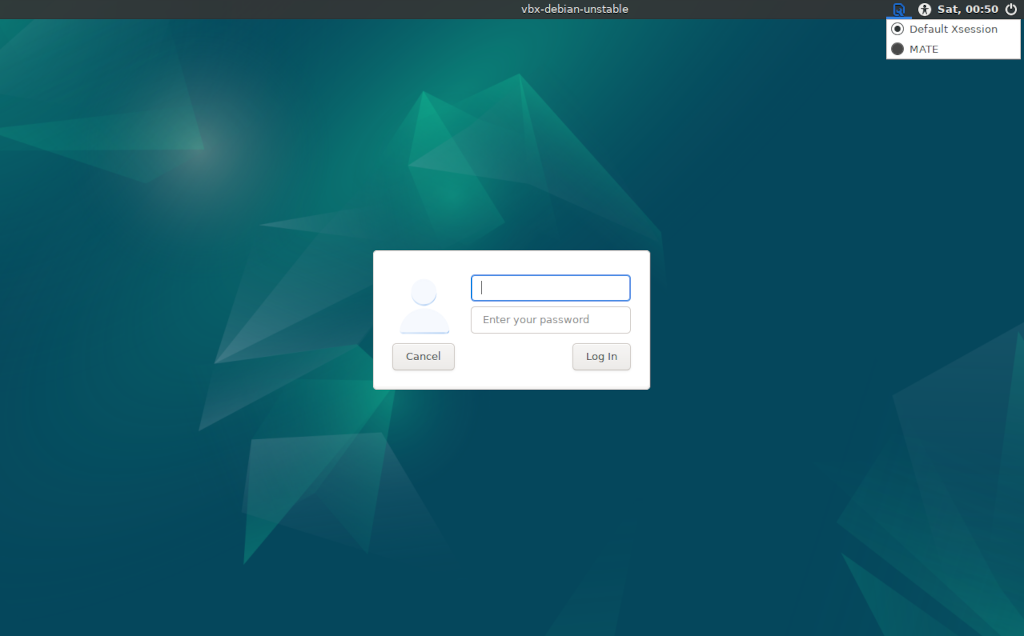
After selecting the MATE session option, the wrench icon should change to an icon resembling a target with a triangle.
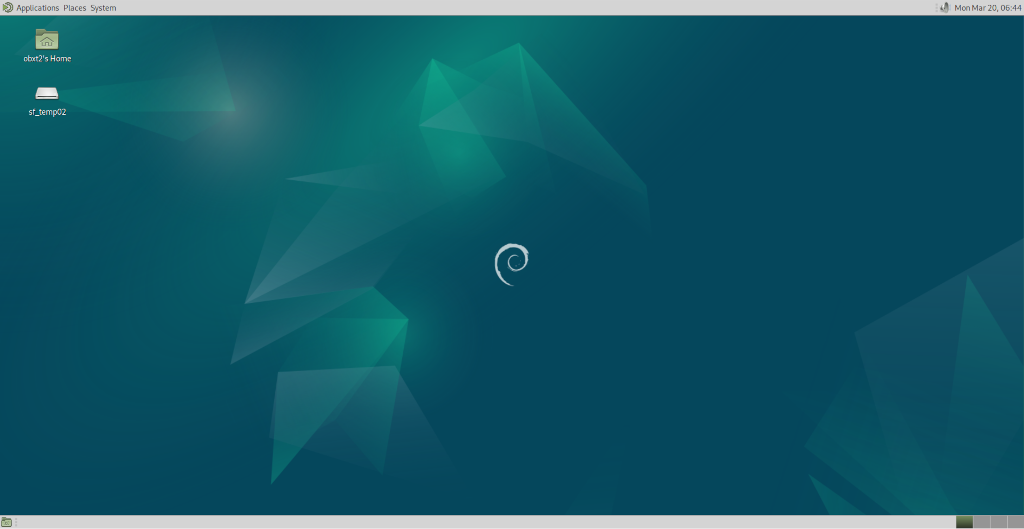
Upon successful login, you should be presented with the Mate desktop. The Applications, Places, and System menus are available in the upper left corner.
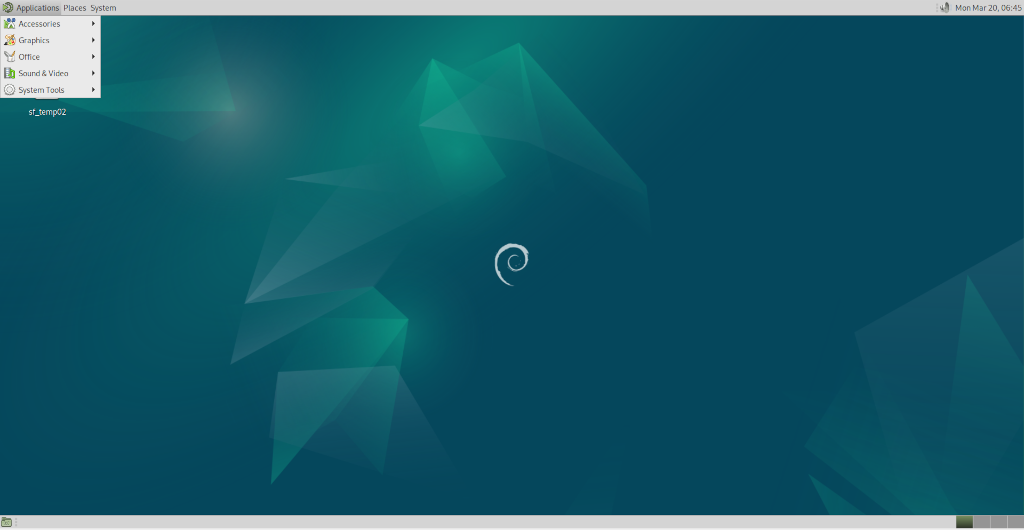
Following are the options available under the Applications menu.
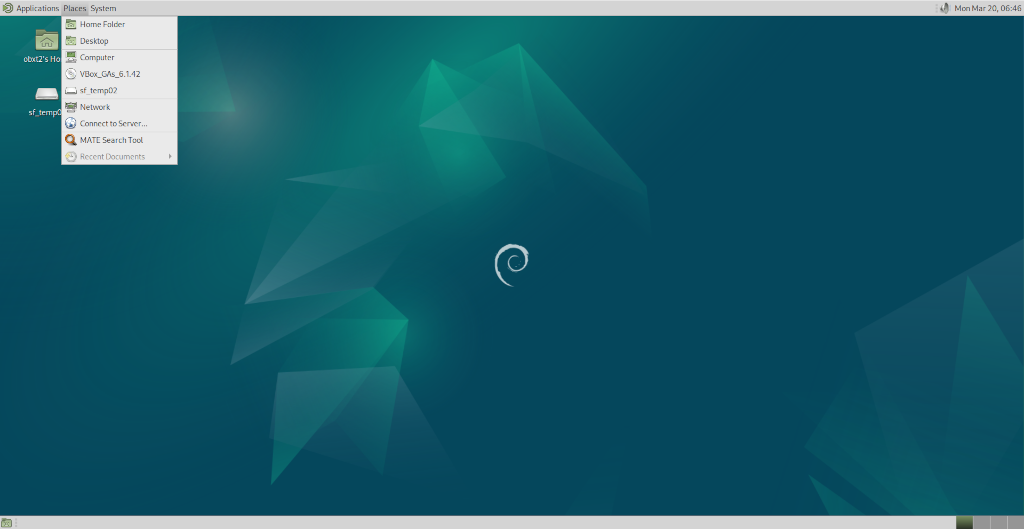
Following are the options available under the Places menu.
Following are the options available under the System menu.
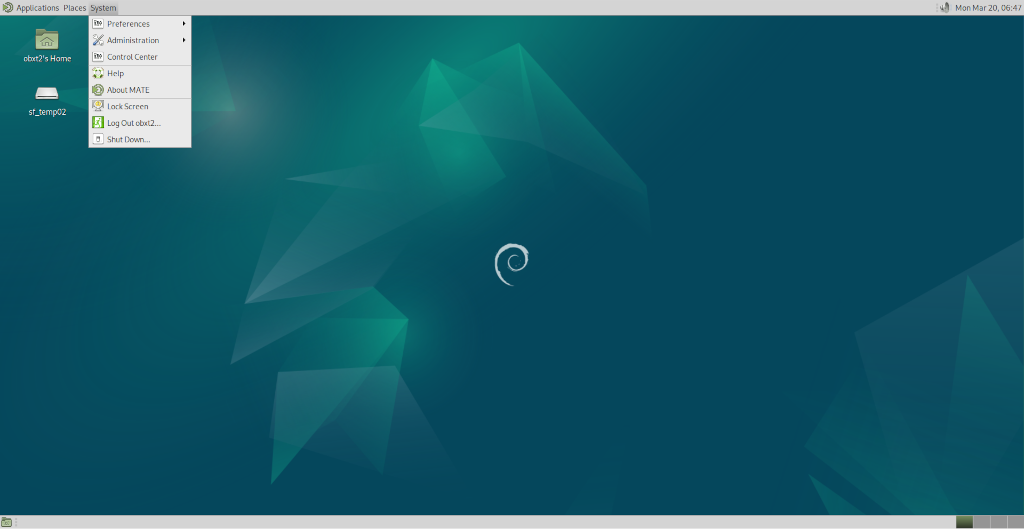
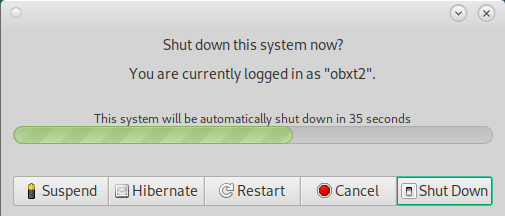
Following are the shutdown options, accessible via the System menu.
4.08 – Desktop Environment Installation – XFCE
The XFCE4 metapackage installs the XFCE desktop environment and a very minimal set of user applications. Therefore, you’ll need to install additional user applications to make the desktop experience more useful. Installing the XFCE4 metapackage and a text editor will take up approximately 737 MB of drive space.
To install the XFCE4 metapackage, enter the following on the command line:
I included the following applications to provide a more user-friendly experience:
- Featherpad: easy-to-use graphical text editor
Once the XFCE4 metapackage and Featherpad installation has completed, reboot your computer by entering the following on the command line:
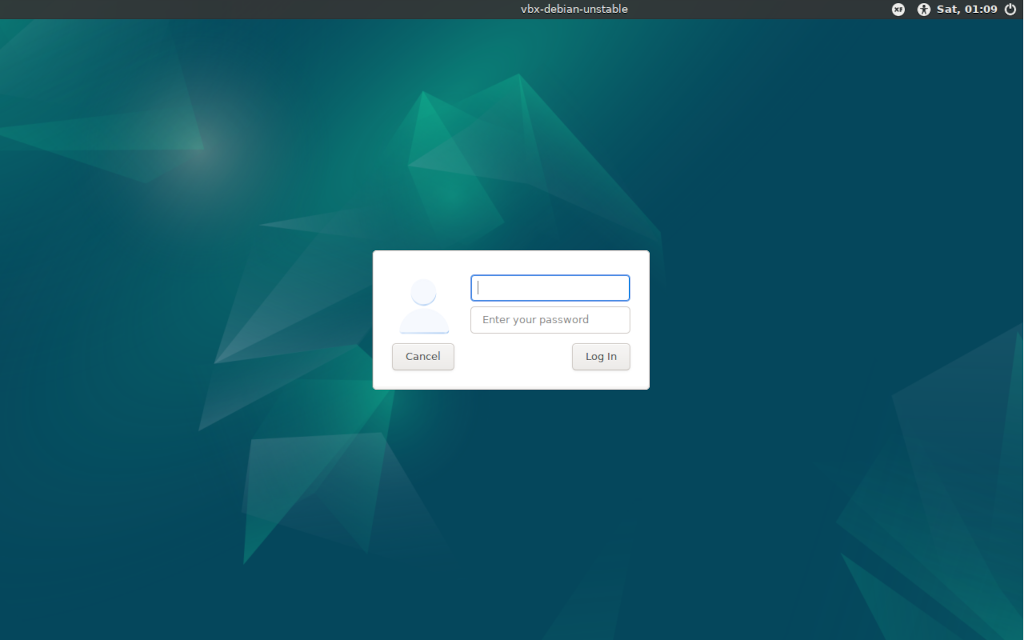
Upon a reboot of your computer, you should be presented with the LightDM login screen.

To initially login to the XFCE desktop environment, you’ll need to click the wrench icon in the upper right hand corner and then select the Xfce session option.

After selecting Xfce session, the wrench icon should change to an XF icon.
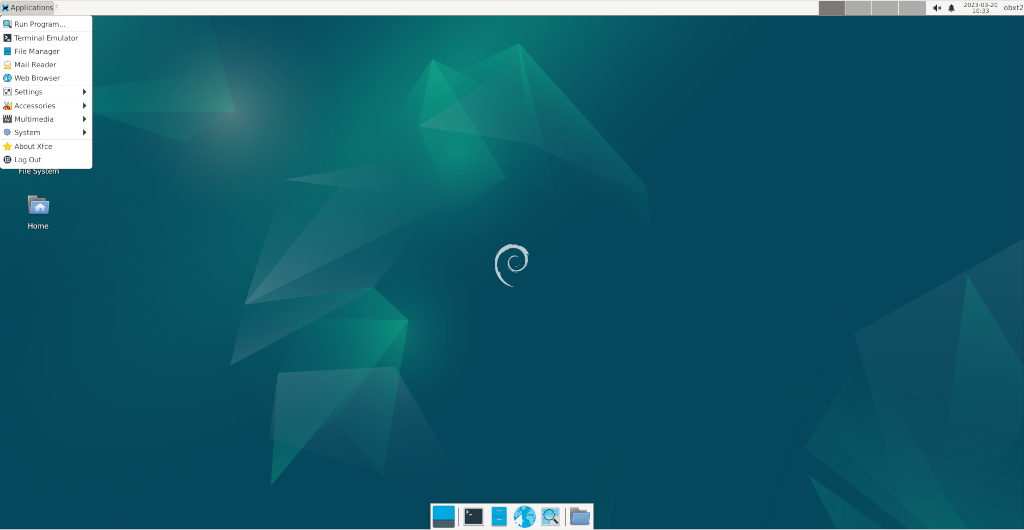
Upon successful login, you should be presented with the XFCE desktop.
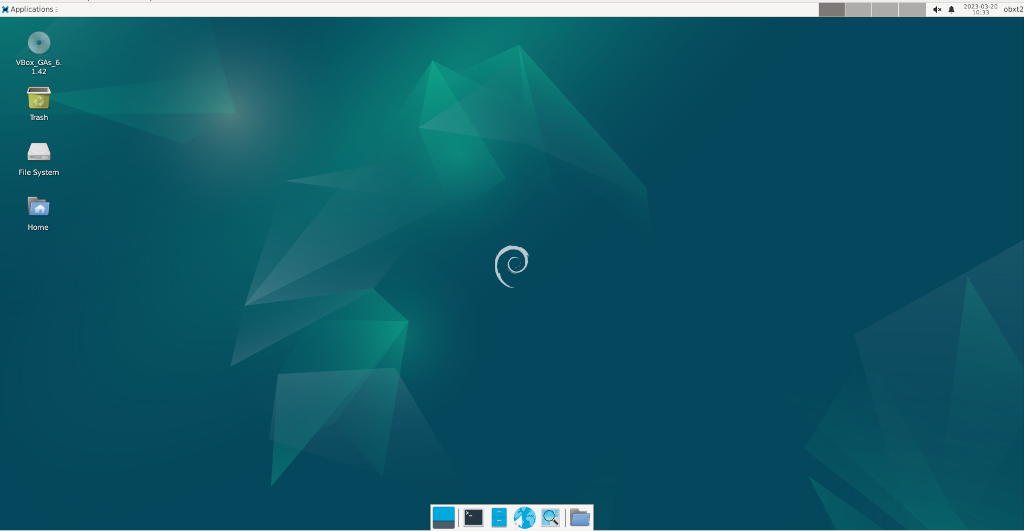
Following are the available options under the Applications menu at the top left.
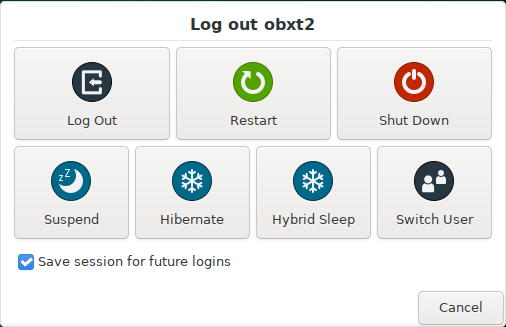
Following are the available options under the logout window, accessible via the Applications menu at the top left.
5 – System Upgrades
Debian Unstable receives many new packages on a daily basis. If you wait a week or longer to perform a system upgrade, you can encounter situations where there are 100 or more packages that are upgraded, which is quite different from Debian Stable. You may also encounter instances where new packages get installed and installed packages get removed. System upgrades in Debian Unstable are mainly performed in one of two ways:
sudo apt full-upgrade
sudo apt upgrade
apt full-upgrade can potentially involve the undesirable removal of packages. The removal of packages isn’t always a bad thing. Sometimes a newer package has been created or sometimes the package is no longer needed. Sometimes though, you may encounter large upgrade transitions or you may have accessed a repository that hasn’t received all of the necessary package upgrades. A red flag should be raised in your mind though when you see desirable packages that will be removed or are flagged as no longer required; e.g. libc6 or main applications like LibreOffice, GIMP, File Roller, etc.
apt upgrade will not involve the undesirable removal of packages. apt upgrade is a safer option to use when encountering situations as depicted in the last sentence of the previous paragraph about apt full-upgrade. However, sometimes just holding a package will allow you to safely perform an apt full-upgrade without the undesirable removal of a package(s).
Debian Unstable should be updated on a regular basis. Waiting months to upgrade a Debian Unstable installation is not a recommended practice. One might ask, “What is a regular basis?” You should aim to upgrade Debian Unstable on a weekly basis. I have updated Debian Unstable as frequently as every other day, but doing so increases the risk of running into problematic full-upgrades. However, I have found that updating every other day results in a lot fewer package upgrades, which in my opinion seems easier to manage.
Because of the rolling nature of Debian Unstable and the fact that package upgrades can result in breakage or a broken system, I highly recommend logging your package activity (installs, removals, upgrades) using your favored note taking application. Logging your package activity can aid you in tracking down the cause of system issues, particularly after system upgrades.
5.01 – System Upgrades – Normal Full-Upgrade
Following is an example of a normal apt full-upgrade; i.e. no undesirable packages flagged as no longer required, no packages to be removed, and no bug reports.
base-files chromium chromium-common chromium-sandbox curl dkms dnsmasq-base
gdisk gimp gimp-data gir1.2-gstreamer-1.0 ipp-usb krb5-locales libcurl3-gnutls
libcurl3-gnutls:i386 libcurl4 libcurl4:i386 libgimp2.0 libgoa-1.0-0b
libgoa-1.0-common libgssapi-krb5-2 libgssapi-krb5-2:i386 libgstreamer1.0-0
libgstreamer1.0-0:i386 libhogweed6 libhogweed6:i386 libk5crypto3
libk5crypto3:i386 libkrb5-3 libkrb5-3:i386 libkrb5support0 libkrb5support0:i386
libnettle8 libnettle8:i386 libnss-systemd libpam-systemd libprocps8
libpython3-stdlib libsystemd0 libsystemd0:i386 libudev1 libudev1:i386
linux-compiler-gcc-10-x86 linux-kbuild-5.10 linux-libc-dev procps python3
python3-minimal python3-pikepdf smart-notifier systemd systemd-sysv udev unrar
usb.ids
55 upgraded, 0 newly installed, 0 to remove and 0 not upgraded.
Need to get 108 MB of archives.
After this operation, 55.3 kB of additional disk space will be used.
In this example, you can feel fairly confident that an apt full-upgrade will be trouble-free, although there is no guarantee. Just because there hasn’t been a bug report filed for any of the packages being upgraded doesn’t mean that you will not encounter a bug.
5.02 – System Upgrades – Packages Flagged as No Longer Required (Autoremovals)
You will sometimes encounter occasions where packages are flagged as no longer required.
libappindicator3-1 libindicator3-7
Use ‘sudo apt autoremove’ to remove them.
The following packages will be upgraded:
bash brave-browser broadcom-sta-dkms dh-strip-nondeterminism exim4-base
exim4-config exim4-daemon-light firefox gir1.2-gnomedesktop-3.0 gir1.2-gtk-3.0
gir1.2-javascriptcoregtk-4.0 gir1.2-webkit2-4.0 gnome-desktop3-data graphviz
gtk-update-icon-cache libcdt5 libcgraph6 libdjvulibre-text libdjvulibre21
libfile-stripnondeterminism-perl libgcrypt20 libgcrypt20:i386
libgnome-desktop-3-19 libgoa-1.0-0b libgoa-1.0-common libgtk-3-0 libgtk-3-bin
libgtk-3-common libgvc6 libgvpr2 libjavascriptcoregtk-4.0-18 libkworkspace5-5
liblab-gamut1 liblz4-1 liblz4-1:i386 libpathplan4 libreadline8 libsmbclient
libtype-tiny-perl libwbclient0 libwebkit2gtk-4.0-37 libwine-development libxml2
libxml2:i386 python3-six python3-urllib3 readline-common samba-libs
vivaldi-stable zenity zenity-common
51 upgraded, 0 newly installed, 0 to remove and 0 not upgraded.
Need to get 342 MB of archives.
After this operation, 2,111 kB of additional disk space will be used.
In many instances, it is okay to go ahead and remove packages flagged as no longer required. As stated in the proposed actions, you can remove packages that are no longer required using the following command:
I generally remove packages flagged as no longer required after upgrading the system.
You may encounter instances where packages are flagged as no longer required when they shouldn’t be. I’ll cover those instances later in this tutorial.
5.03 – System Upgrades – Kernel Upgrades
If you’ve opted to disable automatic kernel removals, when a newer kernel is installed the older kernel will be marked as no longer required.
linux-headers-5.10.0-6-amd64 linux-headers-5.10.0-6-common
linux-image-5.10.0-6-amd64
Use ‘sudo apt autoremove’ to remove them.
The following NEW packages will be installed:
linux-headers-5.10.0-7-amd64 linux-headers-5.10.0-7-common
linux-image-5.10.0-7-amd64
The following packages will be upgraded:
brave-browser git git-man libdebconfclient0 libgail-common libgail18 libgtk2.0-0
libgtk2.0-bin libgtk2.0-common libmariadb3 libtinyxml2-8 libudfread0
libwine-development libxml2 libxml2:i386 libxnvctrl0 linux-compiler-gcc-10-x86
linux-headers-amd64 linux-image-amd64 linux-kbuild-5.10 linux-libc-dev
mariadb-common python3-yaml usb.ids
24 upgraded, 3 newly installed, 0 to remove and 0 not upgraded.
Need to get 234 MB of archives.
After this operation, 401 MB of additional disk space will be used.
You can’t remove the older kernel because it will still be in use. Additionally, you probably shouldn’t remove the older kernel until you’re sure the newer kernel does not introduce undesirable system issues. Once you’ve rebooted your system and feel comfortable that the new kernel is not causing issues, you can remove the older kernel by issuing the following command on the command line:
The –purge option removes any configuration files associated with removed packages.
5.04 – System Upgrades – Problematic Full-Upgrade – Package Bug Encountered
Following is an example of performing an apt full-upgrade where a package bug is encountered:
apt apt-utils bind9-dnsutils bind9-host bind9-libs cdparanoia chromium
chromium-common chromium-sandbox dnsutils exim4-base exim4-config
exim4-daemon-light firefox firmware-amd-graphics firmware-linux
firmware-linux-nonfree firmware-misc-nonfree fonts-liberation2 geoclue-2.0
gir1.2-javascriptcoregtk-4.0 gir1.2-webkit2-4.0 git git-man grub-common grub-pc
grub-pc-bin grub2-common initramfs-tools initramfs-tools-core libapt-pkg6.0
libbabl-0.1-0 libboost-filesystem1.74.0 libboost-iostreams1.74.0
libboost-locale1.74.0 libboost-program-options1.74.0 libboost-regex1.74.0
libboost-thread1.74.0 libcdparanoia0 libcdparanoia0:i386 libcrypt-dev libcrypt1
libcrypt1:i386 libgee-0.8-2 libgegl-0.4-0 libgegl-common
libjavascriptcoregtk-4.0-18 libjpeg-turbo-progs libjpeg62-turbo
libjpeg62-turbo:i386 libkpathsea6 liblirc-client0 libmm-glib0 libobrender32v5
libobt2v5 libpam-modules libpam-modules-bin libpam-runtime libpam0g libsmbclient
libsynctex2 libturbojpeg0 libv4l-0 libv4l-0:i386 libv4lconvert0
libv4lconvert0:i386 libwbclient0 libwebkit2gtk-4.0-37 libwpebackend-fdo-1.0-1
modemmanager nmap nmap-common openbox openjdk-11-jre openjdk-11-jre-headless
openssh-client python3-pygments python3-renderpm python3-reportlab
python3-reportlab-accel samba-libs task-english task-laptop tasksel tasksel-data
timgm6mb-soundfont vivaldi-stable xsane xsane-common
89 upgraded, 0 newly installed, 0 to remove and 0 not upgraded.
Need to get 317 MB of archives.
After this operation, 9,659 kB of additional disk space will be used.
serious bugs of git (1:2.30.2-1 → 1:2.31.0-1)
b1 – #985416 – changing gitexecdir breaks packages that install commands there
Summary:
git(1 bug)
When encountering a bug, you should lookup the bug report(s) to determine if you need to hold the package(s) in question. You can lookup bugs for the Debian distribution using the Debian bug tracking system.
You can lookup bugs using a variety of criteria, but I usually lookup the bug using the bug number. In the above example, I determined that the git bug warranted holding the existing version of git; i.e. not allowing git to be upgraded. To hold a package, enter the following command:
If you have multiple packages that you want to hold, just enter each package name separated by a space.
Learning how to determine if a bug report for a package warrants holding a package will come with experience. When I’m not sure, I hold the package.
After marking the git package for hold, an apt full-upgrade would result in the following actions:
git git-man
The following packages will be upgraded: apt apt-utils bind9-dnsutils bind9-host bind9-libs cdparanoia chromium
chromium-common chromium-sandbox dnsutils exim4-base exim4-config
exim4-daemon-light firefox firmware-amd-graphics firmware-linux
firmware-linux-nonfree firmware-misc-nonfree fonts-liberation2 geoclue-2.0
gir1.2-javascriptcoregtk-4.0 gir1.2-webkit2-4.0 grub-common grub-pc grub-pc-bin
grub2-common initramfs-tools initramfs-tools-core libapt-pkg6.0 libbabl-0.1-0
libboost-filesystem1.74.0 libboost-iostreams1.74.0 libboost-locale1.74.0
libboost-program-options1.74.0 libboost-regex1.74.0 libboost-thread1.74.0
libcdparanoia0 libcdparanoia0:i386 libcrypt-dev libcrypt1 libcrypt1:i386
libgee-0.8-2 libgegl-0.4-0 libgegl-common libjavascriptcoregtk-4.0-18
libjpeg-turbo-progs libjpeg62-turbo libjpeg62-turbo:i386 libkpathsea6
liblirc-client0 libmm-glib0 libobrender32v5 libobt2v5 libpam-modules
libpam-modules-bin libpam-runtime libpam0g libsmbclient libsynctex2
libturbojpeg0 libv4l-0 libv4l-0:i386 libv4lconvert0 libv4lconvert0:i386
libwbclient0 libwebkit2gtk-4.0-37 libwpebackend-fdo-1.0-1 modemmanager nmap
nmap-common openbox openjdk-11-jre openjdk-11-jre-headless openssh-client
python3-pygments python3-renderpm python3-reportlab python3-reportlab-accel
samba-libs task-english task-laptop tasksel tasksel-data timgm6mb-soundfont
vivaldi-stable xsane xsane-common
87 upgraded, 0 newly installed, 0 to remove and 2 not upgraded.
Need to get 0 B/309 MB of archives.
After this operation, 9,163 kB of additional disk space will be used.
The git-man package was automatically kept back or held as a result of marking the git package for hold. After performing the apt full-upgrade, you should unhold any held packages as follows:
Multiple packages can be unheld by using a space between each package name:
To unhold all held packages at once, enter the following command:
Because Debian Unstable is very similar to a rolling release Linux distribution, indefinitely holding a package is not recommended. Doing so may result in a broken system.
5.05 – System Upgrades – Problematic Full-Upgrade – Holding a Package Results in Undesired Packages to Be Removed or Packages Being Undesirably Flagged as No Longer Required
Sometimes holding a package due to a bug report can result in undesired packages being removed or packages being undesirably flagged as no longer required.
calibre-bin libchm1 libpodofo0.9.7 optipng python3-apsw python3-chm
python3-css-parser python3-cssselect python3-cssutils python3-dateutil
python3-dnspython python3-feedparser python3-html2text python3-html5-parser
python3-markdown python3-mechanize python3-msgpack python3-pygments
python3-pyparsing python3-pyqt5.qtsvg python3-pyqt5.qtwebchannel
python3-pyqt5.qtwebengine python3-regex python3-repoze.lru
python3-requests-toolbelt python3-routes python3-speechd python3-webob
Use ‘sudo apt autoremove’ to remove them.
The following packages will be REMOVED:
calibre libsrt1-gnutls python3-numpy
The following NEW packages will be installed:
libsrt1.4-gnutls linux-image-5.10.0-2-amd64
The following packages have been kept back:
libpython3.9 libpython3.9-minimal libpython3.9-stdlib python3.9
python3.9-minimal
The following packages will be upgraded:
bind9-dnsutils bind9-host bind9-libs busybox ca-certificates calibre-bin
chromium chromium-common chromium-sandbox dnsmasq-base dnsutils dwz ffmpeg
filezilla filezilla-common firmware-amd-graphics firmware-iwlwifi firmware-linux
…
188 upgraded, 2 newly installed, 3 to remove and 5 not upgraded.
Need to get 0 B/334 MB of archives.
After this operation, 227 MB of additional disk space will be used.
In the above example, I had held the package libpython3.9 due to a bug report. However, holding the libpython3.9 package resulted in the undesirable flagging of multiple packages as no longer required and the undesirable proposed removal of other packages. In such instances as this, it’s better to run an apt upgrade instead of an apt full-upgrade.
Following were the proposed actions when running apt upgrade:
linux-image-5.10.0-2-amd64 python3-py7zr python3-pycryptodome python3-texttable
The following packages have been kept back:
ffmpeg gstreamer1.0-plugins-bad libavcodec58 libavcodec58:i386 libavdevice58
libavfilter7 libavformat58 libavresample4 libavresample4:i386 libavutil56
libavutil56:i386 libgstreamer-plugins-bad1.0-0 libpostproc55 libpython3.9
libpython3.9-minimal libpython3.9-stdlib libswresample3 libswresample3:i386
libswscale5 python3.9 python3.9-minimal
The following packages will be upgraded:
bind9-dnsutils bind9-host bind9-libs busybox ca-certificates calibre calibre-bin
chromium chromium-common chromium-sandbox dnsmasq-base dnsutils dwz filezilla
filezilla-common firmware-amd-graphics firmware-iwlwifi firmware-linux
firmware-linux-nonfree firmware-misc-nonfree fonts-liberation2 fonts-wine
…
173 upgraded, 4 newly installed, 0 to remove and 21 not upgraded.
Need to get 0 B/347 MB of archives.
After this operation, 334 MB of additional disk space will be used.
Don’t forget to unhold any held packages:
To unhold multiple held packages, use a space to separate each package name:
To unhold all held packages at once, issue the following command:
5.06 – System Upgrades – Problematic Full-Upgrade – Undesired Packages to Be Removed or Packages Being Undesirably Flagged as No Longer Required
Performing an apt full-upgrade can sometimes result in the undesirable removal of packages or packages being undesirably flagged as no longer required:
diffstat libaliased-perl libbasicusageenvironment1 libcapture-tiny-perl
libconfig-tiny-perl libdata-messagepack-perl libdata-validate-domain-perl
libdevel-size-perl libemail-address-xs-perl libfile-find-rule-perl
libfont-ttf-perl libgdk-pixbuf-xlib-2.0-0:i386 libgdk-pixbuf2.0-0:i386
libgroupsock8 libhtml-html5-entities-perl libio-string-perl libipc-run3-perl
libiterator-perl libiterator-util-perl libjson-maybexs-perl liblist-utilsby-perl
liblivemedia77 libmarkdown2 libmoox-aliases-perl libmouse-perl
libnet-domain-tld-perl libnumber-compare-perl libperlio-gzip-perl
libproc-processtable-perl libsereal-decoder-perl libsereal-encoder-perl
libtext-glob-perl libtext-levenshteinxs-perl libtext-markdown-discount-perl
libtext-xslate-perl libtime-moment-perl libusageenvironment3
libyaml-libyaml-perl t1utils
Use ‘sudo apt autoremove’ to remove them.
The following packages will be REMOVED:
libclass-xsaccessor-perl libcommon-sense-perl libdata-dpath-perl libjson-xs-perl
libtypes-serialiser-perl lintian
The following NEW packages will be installed:
libfcgi-bin libfcgi0ldbl
The following packages will be upgraded:
acl bind9-dnsutils bind9-host bind9-libs chromium chromium-common
chromium-sandbox debhelper distro-info-data dnsutils dwz e2fslibs e2fsprogs
e2fsprogs-l10n exim4-base exim4-config exim4-daemon-light ffmpeg fuse3 gdisk
gir1.2-vte-2.91 gjs gparted gparted-common gpick groff-base iio-sensor-proxy
…
251 upgraded, 2 newly installed, 6 to remove and 0 not upgraded.
Need to get 323 MB of archives.
After this operation, 1,352 kB disk space will be freed.
In the above example, a large Perl transition was underway. In situations like this, it’s better to run an apt upgrade instead of an apt full-upgrade. Following were the proposed actions for an apt upgrade:
libbasicusageenvironment1 libgdk-pixbuf-xlib-2.0-0:i386 libgdk-pixbuf2.0-0:i386
libgroupsock8 liblivemedia77 libusageenvironment3
Use ‘sudo apt autoremove’ to remove them.
The following NEW packages will be installed:
libfcgi-bin libfcgi0ldbl
The following packages have been kept back:
libperl5.32 libperl5.32:i386 perl perl-base perl-modules-5.32
The following packages will be upgraded:
acl bind9-dnsutils bind9-host bind9-libs chromium chromium-common
chromium-sandbox debhelper distro-info-data dnsutils dwz e2fslibs e2fsprogs
e2fsprogs-l10n exim4-base exim4-config exim4-daemon-light ffmpeg fuse3 gdisk
gir1.2-vte-2.91 gjs gparted gparted-common gpick groff-base iio-sensor-proxy
…
246 upgraded, 2 newly installed, 0 to remove and 5 not upgraded.
Need to get 310 MB of archives.
After this operation, 5,403 kB of additional disk space will be used.
5.07 – System Upgrades – Persistent Proposed Package Removals
It’s possible to experience instances where you continue to encounter a proposed package removal during an apt full-upgrade. You could hold such packages, and there are some instances where that is desirable. However, due to the rolling nature of Debian Unstable, it’s generally not recommended to hold a package indefinitely.
In some instances, you can allow a package to be removed and then re-install it. I haven’t learned when to determine when such instances are warranted. When I encounter persistent proposed package removals, I present the issue over on the Siduction Upgrade Warnings forum. Some of the forum members have contacts with the Debian development team and one of the Siduction forum members will usually let you know when it is best to allow a package removal.
Sometimes, a package can get removed and then the package is later included as a new install. Such instances are just part of the nature and purpose of Debian Unstable; refer to the introduction in this tutorial.
5.08 – System Upgrades – Transitions
Transitions can result in the undesirable removal of packages, or the undesirable flagging of packages as no longer required. I check the Siduction Upgrade Warnings forum for news on transitions. Note that transition news reported in the Siduction Upgrade Warnings forum may not always apply to you, depending upon the packages you have installed. Many of the Siduction forum members seem to run the KDE desktop environment (I don’t) based on the time I’ve spent reading the forums.
Another source for monitoring transitions is the Debian Release Management – Transition tracker. However, I’ve not been able to learn to use the resource well enough for it to be useful to me.
You could also subscribe to or view the debian-devel mailing list. Sometimes large transitions are announced via the mailing list.
5.09 – System Upgrades – Downgrading a Buggy Package
It is possible to upgrade a package that turns out to have an unreported bug, rendering an important application unusable or causing system breakage. What should you do in such circumstances? You have two options.
First, installing or upgrading a package results in an associated *.deb file being stored under /var/cache/apt/archives, also known as the package cache or local repository. I prefer the term package cache, so hereinafter I will use that term. Locate the desired package if still available and re-install it using the following command:
The -i option forces the installation of an earlier version of a package.
Another option is to visit the Debian Snapshot Service, searching for the binary version of your desired package over on the left side of the main page under Packages. Once you have located and downloaded the desired package (should be in *.deb format), install it using the same method referenced above, substituting the applicable path to the downloaded file.
Warning: Use package downgrading judiciously. Make sure you understand any possible repercussions of downgrading a package. Downgrading some packages, e.g. libc6, could break your system.
5.10 – System Upgrades – After a New Debian Stable Release
At some point, the Debian Release Team decides to freeze any further inflow of new packages, with some exceptions, into the Debian Testing repository in preparation for the release of the next version of Debian Stable. Eventually that means there will be very few, and sometimes no, updates when you perform an apt full-upgrade or even an apt upgrade. So a backlog of newer packages will await the release of Debian Stable.
Once Debian Stable is released, the backlog of newer packages flows into Debian Unstable. When you perform an apt full-upgrade, you’ll be presented with hundreds of proposed actions, including new package installs, package removals, packages flagged as no longer required, and packages to be upgraded. Therefore, the general recommendation that I’ve learned from others is to wait about a week after the release of a new version of Debian Stable before attempting to perform an apt full-upgrade. You can also check the Siduction Upgrade Warnings forum to see if and when it is safe to commence system upgrades following the release of a new Debian Stable release.
5.11 – System Upgrades – Purging the Package Cache
As mentioned previously, the act of installing and upgrading packages results in the storage of *.deb files under /var/cache/apt/archives, also known as the package cache. It’s a good practice to clean up the package cache routinely to free up drive space. To purge the package cache, enter the following command:
6 – Conclusion
I enjoy using Linux rolling release distributions because of the newer packages that are available. I hope the tips in this tutorial prove helpful should you choose to use Debian Unstable as your daily driver.
I owe a great deal of thanks to Julius Hader (aka machinebacon) whose post on running CrunchBang Linux using the Debian Unstable repositories began my journey on using Debian Unstable on a regular basis. Julius also helped me out a great deal when I decided to use CrunchBang Linux full time back in 2012.
I also owe a great deal of thanks to members of the former CrunchBang Linux forums, as well as members of the BunsenLabs forums, who helped me at times when I ran into problems using Debian Unstable.
Finally, I owe a great deal of thanks to the members of the Siduction forums who have helped, and continue to help, me immensely with becoming proficient at running Debian Unstable.
If you have a question or comment, leave it in the Comment box at the bottom of the page.
7 – Useful Resources
Most of the sites below have been referenced within this post, but I’m also listing them here as a concise handy reference.
- BunsenLabs Forums
- Debian Administrators Handbook
- debian-devel Mailing List
- Debian Packages
- Debian Release Management – Transition Tracker
- Debian Snapshot Service
- Debian User Forums
- Debian Wiki – Debian Unstable
- Debian Worldwide Mirror Sites
- Siduction Linux Distribution
- Siduction Upgrade Warnings Forum
Post header image courtesy of linux-apps.com, GPLv2 or later licensed.
2021-007


You May Also Like
Penclic, My Favorite Keyboard

Shared Bits 6-Year Anniversary